Showing posts with label fabrics. Show all posts

Thursday, January 2, 2014

2014 Color Forecast

Hello everyone, Happy New Year!  I am happy to be back on my original blog site doing what I set out to do when I first started my blog in 2011.  My original intent was to share my creative life with other like minded people who love to read about living a similar lifestyle to their own and getting inspired to try new things via my projects and experiences. Last year I got a wild hair and thought I needed to split up my blog posts so that only sewing projects would be featured on this blog page and all the rest of my projects should be on a different blog page.  Not the best idea I ever had, it was just way too difficult to split them up and find time to write for two separate blogs, total failure! Oh well, live and learn!  Time to move on and go back to doing what I love best which is being my all around creative self and writing about it as I go along on one blog page.  I may still post one of my painting projects on the other blog page from time to time but I will let you know when that happens, the rest of the time everything else will be right here where it belongs.

Buttons, Bows & Bling is back and hopefully much improved, with that being said I want to share the new Pantone Color Forecast for 2014.  Pantone is the industry leader in color forecasting for all avenues of design and fashion, setting the stage for color ways through every industry. And now…

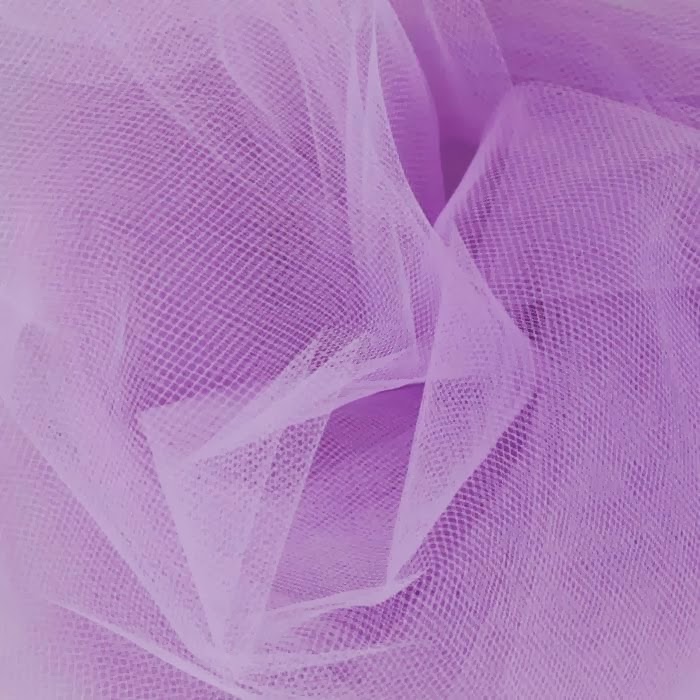
Here it is…. Pantone’s Color of the Year 2014 is…… (Drum roll please!)… Radiant Orchid; which is an enchanting harmony of fuchsia, purple and pink undertones blooming with confidence and magical warmth that intrigues the eye and sparks the imagination. Radiant Orchid is an expressive and embracing purple, one that draws you in with its beguiling charm and captivating harmony which emanates great joy, love and health. 

Radiant Orchid is already sweeping straight across all industries with the production and release of products to professionals and retail consumers. Here are just a few examples of how Radiant Orchid is already being shown.


A wide variety of textile prints, fabrics and threads.

Fashions and accessories

Cosmetics

Paper textiles

Paints for every surface


Furniture, upholstery and accessories

Last but not least, interior design.

As you can see for yourself Radiant Orchid has touched just about every industry and is very widespread with possibly the exception of the auto industry, but don’t quote me on that, you just never know what they are going to do next. 
For myself, I love every shade of lavender and purple and Radiant Orchid is no exception, I am sure I will be found wearing the darker purples during the rest of the winter months and the lighter shades right into spring and summer.  However, I do not think it will become part of my home décor or painting projects unless I am creating something for one of my granddaughters, time will tell and I will share it with you if I do use it in a project.  For those of you who sew, paint or design for a living this is a good heads up as to how color is trending throughout 2014.

Although Radiant Orchid is the color of the year it is not the only color trending for this coming spring; soft pastels paired with vivid brights will create new looks and color combinations that refresh and revive everyday fashions.  I will share those with you in a future post so you can be right on top of the current trends and maybe even ahead of the game.

Thanks for letting me share the color of the year; it was great fun putting it together for you. Come along with me as I share all my creative adventures and inspire you to step out of your comfort zones and try some new things this year.  I wish all of you a very Happy, Productive and Creative New Year!!!
See you soon.

Laurette


Monday, August 19, 2013

Writers Wall Quilt


I have wanted to share this lovely wall quilt with you for sometime but I just have not been able to show you this project until now.  Sometime ago my oldest sister and I bought a wonderful set of antique looking fabrics when our local quilt shop went out of business.  We had no real idea what we would make out of the fabrics so we bought one of the kits which included wine type prints for me and coordinating fabrics which had typeset and writers words on it for her with the idea of using the same pattern for both quilts. The pattern included in the kit was, Simply…ho! ho! ho! by Me and My Sister Designs, the store sample was made up in the kit fabrics so I knew it was just the ticket for what we wanted to use these stunning fabrics for.

Between the sample photo and the great instructions I had no problems assembling it; however, I highly recommend reading it all the way through at least once to avoid making any mistakes.  I wanted to make a change to the pattern and did not pay close enough attention to part of the instructions and ended up with a re-design part way through to compensate for the miss-cuts.  I was extremely lucky I had enough extra fabric to fix my mistakes creating a “design opportunity” which worked out just fine in the end.


I wanted the wall quilt to be very unique and artsy so I included some embellishments in the center of the quilt and around the edges.  I added my sister’s initials across the bottom and top of the center section using typewriter key brads and stitched on an antique heart, key, ring and button in each section of the middle giving the quilt dimension. 

Thanks for letting me share my Writers Wall Quilt with you, I really love how it came out and my sister was thrilled to receive it, she hung it in her office.  I made a few more projects from the quilt scraps which I also gave to my sister, those are up next.
See you soon.


Laurette

Friday, January 18, 2013

Apron A Day #5


This darling shoe apron is one of my designs sewn with three coordinating fabrics from a great collection. When I purchased the fabric I had no idea what I was going to use it for, I just fell in love with it so I bought it and the fabrics became part of my ever growing stash. I wanted to use all three of the prints so I picked the panel for the front and the smallest print for the lining with the tiny shoe print for the ties and ruffles on the top and bottom.  I did not include a pocket because I chose to embellish the apron with complementing buttons and rick rack to bring out the pattern and colors giving it some added dimension. The apron is lined to add weight and extra body, not to mention good protection for my clothing while I am cooking, always a good thing for a messy cook.

This little diva shoe apron was meant for cooking and compliments, thanks for letting me share it with you today.  There will be more aprons featured in a few days, the next one has some real retro flare and is one of my favorites.
See you soon.

Laurette

You might also like:
Apron A Day 1, 2, 3 & 4 (Archives 2012 for 1, 2&3)


Monday, September 10, 2012

Cabo Bucket Bag


Last Saturday I took the Cabo Bucket Purse making class, I have been waiting for this class since I took the Marissa Bag class on my birthday, part two of my gift from my husband, what a great guy I married.


Just before my class I went to The Nimble Thimble in Gilroy to purchase my class supplies and fabric.  It took a bit of time to figure out what I wanted to use for my purse fabric, with the help of the store owner, Dave and my husband, I settled on Rooftop Garden by Moda, two very pretty fabrics showcasing fall colors in several shades of green, orange, gold and plum. Afterwards I went home to do the pre-class prep of cutting out all my fabrics and fleece, a very long process.


My teacher, Sheila, was great about sharing all her little tips and tricks and had wonderful suggestions for making the purse go together as easy as possible. It was an all day project but absolutely worth every minute, my bag came out fantastic and we had a great time sewing and chatting the day away.  I was totally worn out when I was done but I would do it again, I plan to take a few more purse making classes in the very near future.


The bag is lined with a complimentary fabric with another contrasting fabric for the exterior pocket lining, the button and the interior pockets, there are eight with a contrasting trim.  The bucket bag is pulled into shape by a magnetic closure and held closed with an oversize button. I am very pleased with my new purse; I can not wait to start using it as soon as I break out my fall wardrobe.

Thanks for letting me share my new Cabo Bucket Bag; I had a great time making it along with the Marissa Bag I made last week.  Time to move on and share some of my other projects, I have quite a few to show you, watch for those in the next few days.
See you soon.

Laurette

You might also like:

Marissa’s Bag in Orange
Colorful Fabric Zip Bags (Feb. 2012)
Project Progress (May 2012)

Monday, July 9, 2012

Where I Sew


Recently on the Pink Chalk Studio Blog, by Kathy Mack, she began a month long virtual studio tour sharing a peek at the sewing studios of some of her favorite designers and sewing enthusiasts, real spaces where real people sew. We, her readers, were also invited to share our studios on her blog mosaic, what a fantastic idea.  I jumped on board with the help of my graphic designer, from A Jeweled Design, who figured out how to link the photo directly to the blog page, the photo originated from, to the Pink Chalk Studio blog. She then added the Pink Chalk “Where I Sew” icon to my blog post pages, in the side bar right below the sites I follow, so you can click on the icon and go directly to Kathy’s virtual tour page and see my studio photo, click on that and you get my blog page for that post. I highly recommend you also click on all the studio photos and enjoy some really wonderful creative spaces.  Since the photo from my studio only featured one area, I decided to do a virtual tour of my own showing you where I create, a couple of the photos are a bit dark because of the three windows, which pour in sunlight and make it tough to photograph, while other areas are a bit tricky to get a decent shot, hang in there with me, you will get the overall idea.  Here we go.

This is the photo submitted to the Pink Chalk Studio Blog which happens to be the one of my fabric storage walls, let’s start the tour here.

We move along to the adjoining corner of the room featuring my cutting table.

Down the window walls is where I keep my paper crafting and jewelry making supplies, it also houses my stereo, iPod, DVD player and flat screen TV.

This is my sewing counter wall which sits directly across from the fabric cubbie wall.  It has 8’ of counter space allowing for two sewing machines or one machine and a crafting area, which is usually the case, unless I am giving sewing lessons and need to put out another sewing machine, I have four of them. There are two small design boards over each area along with some of my dress form collection and couture dress photos.  Above the work stations there is another set of cubes which hold fabrics, notions and more of my couture dress forms.

My fitting corner has 3 mirrors at several heights allowing me to see a garment from several angles, a real must when fitting a garment alone.


Last but not least are the huge white closet doors opposite the windows, these are my inspiration walls with couture photos, a mirror and lots of creative mood boards. I left one of the three doors white to use as a design wall and to photograph projects on. (Not shown here)

Thanks for letting me share the virtual tour of Where I Sew with you, I hope you enjoyed it and it inspires your to find a creative space of your own, no matter what size space you have to work with.  If you already have a place you enjoy sewing or crafting in I would love to see it and share it with my readers, just e-mail me a photo and what kind of things you create in there and I will post it on my blog. It does not have to be a large room like mine, it can be your dinning room table or a closet, I can’t wait to see it, send it on over.
See you soon

Laurette

You might also like:

Fabric Organization
The Organization Bug
Contain That Clutter - Parts 1, 2 & 3
Studio Supply Storage
Studio Inspiration Boards


Tuesday, May 22, 2012

Back to Babies


Currently, I am back to sewing baby gear for our new grand baby who is due this coming fall.  This time around I am working with soft, cuddly printed flannel, I just love working in flannel since it is easy to use and irons up nicely at the finish of each project, not to mention keeping baby nice and warm.  All these prints are just darling, some of them are geared for a baby boy or girl and some can be used for either one.  I will probably make my projects out of both prints and put away which ever one I don’t use for this baby and save the others for the next one.

My newest baby projects are newborn kimono jackets, I made them when both my children were babies and used them all the time after a bath and over their little pajamas and nightgowns for extra warmth; the cotton versions are great for summer playtime or sleeping in on a warm night.  While digging through my patterns, this cute jacket just jumped out at me as something I should make for our new baby, it is not something you see new mom’s using these days, maybe it will make a come back this year when I re-release the pattern and jackets later this fall.  The pattern is simple to read and easy to use, they make up pretty quickly using the flannel, bias tape and printed ribbons.


This little top can be worn by either a boy or a girl but leans slightly towards a baby boy with the darling blue elephants and the orange trim.  I made another jacket in the same fabric with a matching green trim and a pale yellow bow before going on to work with the other prints; each one will be totally unique with different trims and ribbons, no two will be alike.

Thanks for letting me share my newborn kimono jackets with you, there are going to be lots of baby projects mixed in with all the other painting and craft projects over the next couple of months. I hope they inspire you to create some baby gear of your own for your baby, grand baby or as a shower gift, happy sewing. 

See you soon.

Laurette

If you enjoyed reading this post you might also like:

All About Babies
Fun Fabric Animals
Gift Card Envelopes and Owls- Dec. 2011
A Quick Gift- Dec. 2011

Tuesday, May 15, 2012

Sewing The Blues


The forecast for spring and summer colors introduced by the fashion and interior design industry called for tangerine/oranges, citron/lime, yellows and blues in every shade imaginable.  Tangerine made a huge splash on the runways and in the home interior previews early this spring.  Right behind the oranges were strong colors in greens and blues; the trend seems to have continued right into the summer lines of clothing, indoor and outdoor furnishings and accessories.  I absolutely adore the fact that blues and greens are making a huge comeback this year; hues of blue have always been my favorite colors since I was a pre-teen and I am very happy to be using them again.

My personal moodboard in a variety of blues and greens, which sits above my desk, was inspired by Pink Chalk Fabrics’ blog, Pink Chalk Studios, featuring textiles by Maasai Mara from dear Stella and Ellen Luckett Baker for Moda.  I use moodboards to collect colorful images to inspire my fabric, paint and project style choices, this one encouraged me to go blue and green in my next project.


Apparently last year I was way ahead of the curve with my Paisley Crazy Room Makeover where I featured lime greens, blue and turquoise as my updated color scheme.  I constantly study, watch and read about fashion and interior design so I can stay up on what is new and fresh each season. I had an inkling as to the coming color changes and chose them for my guest room/office even though some people thought I was nuts for putting them in my home.


I am at it again, in the early spring I picked out some beautiful blues and greens for my outdoor patio makeover project.  Large prints, geometric patterns and stripes are all the rage in outdoor fabrics and I have them all in complementary colors, a great way to spruce up my dull patio cushions and add some tropical bling.  I already started sewing up several cushion covers but decided to hold off finishing them until the big tree next door finishes shedding sticky pollen and leaves all over my patio; I plan to get back to  sewing early next week so everything will be done in time for a party in mid June.  Once I finish them I will write a before and after post so you can see the difference the new blues and greens made, should be a good one.

Thanks for letting me share Sewing The Blues with you; I hope it inspired you to perk up your indoor and outdoor rooms with some of the new bright and cheerful colors of the summer season.  See you soon.

Laurette

If you enjoyed reading this post you may also like:

Paisley Crazy Room Makeover – Nov, 2011


Related Posts Plugin for WordPress, Blogger...