Hello Everyone,
I have been gone for some time now, a lot longer then I planned actually, I was down very ill and I was just not up to working on any creative projects, but I am back to my old self ready to get to work on lots of interesting projects. In fact I have a new one to share with you on my new blog page over at Create*Upcycle*Decorate*Organize, it is a curb appeal project I think you will all enjoy, I will say no more, you will just have to click over and check it out.
I have also been working on redecorating the whole downstairs of my home the past week or two, I am not sure if I am going to share that project with you or not, we will see how I feel about it when I am done. I will say I have gone back to my roots by bringing back my Tuscan inspired colors/ theme and replacing the reds and browns of the coffee shop theme. I can also say I am much happier now that I am almost done and the tranquil atmosphere of my home has returned, no more red! That's a story for another time.
I look forward to sharing many more fun projects with you from my studio. Don't forget to check out my new curb appeal project, Southern Carriage House.
See you soon.
Laurette
Tuesday, March 12, 2013
Wednesday, February 13, 2013
Happy Valentine's Day
Hello Everyone, I want to
wish each and every one of my readers a very lovely Valentine’s Day. I hope you all have some kind of special
plans for your day even if it is just cooking a special dinner, setting the table
with your best china and popping in a love story DVD to watch with that very
important someone in you life.
I apologize for not writing
for a bit, I am and have been down with a very nasty bug which seems to be
plaguing just about everyone. I held it
off as long as I could but alas I succumbed to it and still have not
recovered. I do plan to return soon, I
have several projects ready to sew up and I also have my spring and summer
color forecast, which I do each year, so you can be up on the newest color
trends released by Pantone for home and fashion, I can not wait to share those
with you right away.
***Check out my newest blog
post; Adventures With Adhesive over at
createupcycledecorateorganize.blogspot.com. It is a fun post featuring recycled
containers for organizing your kitchen and office. Check it out by clicking on
the button on the right side of this page; it will take you right to the post.
Have a wonderful Valentine’s
Day!
See you soon.
Laurette
Tuesday, January 29, 2013
Apron A Day #6
Today is double post Tuesday
so you get two for one. The first thing I want to share with you is the great
news about my new blog, it is now completed and I have already written my first
post which went live last week on January 23.
You can access my new blog by clicking on the button marked Create*Upcycle*Decorate*Organize
on the right side of my page which is right below the Pinterest button. Everything on that side of my blog page is a
link to the symbol shown; like my Pinterest boards, the link to Where I Sew with
Pink Chalk studios and the story I wrote for Coats & Clark 200th
Anniversary. I am totally in love with my new blog page and the fantastic work
my Graphic Artist, Jolene Burt, did on both pages, she is fantastic! Anyway, hop on over and check it out!!! The
new blog will show all my projects for anything I create which are not sewn on
a sewing machine. Buttons, Bows &
Bling will remain a sewing blog for clothing, toys, quilts and home décor items,
like pillows, drapes, etc… For those of you who get this blog notification by
email you will have to go to my new blog and sign up for email there to keep
getting all my new projects which I will post on that sight; basically you have
to sign up for email on both if you want to see what I am creating.
Now for the second post of
the day, today’s post is a juicy orange apron, I made from one of my patterns,
to wear while teaching sewing classes. I
fell in love with this fabric but I had no idea what I would use it for, I adore
fabrics with sewing themes on them and this had that going for it with all the
cute measuring tapes and polka dots.
Because I wanted to wear the
apron while sewing and teaching I felt it needed lots of useful pockets for
scissors, measuring tapes, tailors chalk, pins and all the rest. One small
pocket was added to the top for my glasses and one long pocket divided into
four sections was added along the bottom width for my sewing notions, making it
easy for quick access.
I added some retro 60’s
orange pom poms, from my stash, to the top and bottom of the apron and some
jumbo orange rick rack to give it a little more retro flare; you know how much
I love my retro accessories on aprons. I lined the apron in a complimentary
fabric to give it enough body so the pockets would not sag when I placed my
heavy cutting shears in them. This was a really fun apron to make and wear
since it is so bright and cheery.
Thanks for letting me share
the fantastic news about my new blog and my cheery orange sewing apron. There
are still more aprons to share with you on this blog and lots of fun new posts
on the new blog. I am working on
organizing my small office space with pretty new accessories so it will be functional
and attractive. Be sure you watch for that new post over there in the next day
or so.
See you soon.
Laurette
***On our new blog, Create*Upcycle*Decorate*Organize you might like:
Small Office Organization –
Part 1
Friday, January 18, 2013
Apron A Day #5
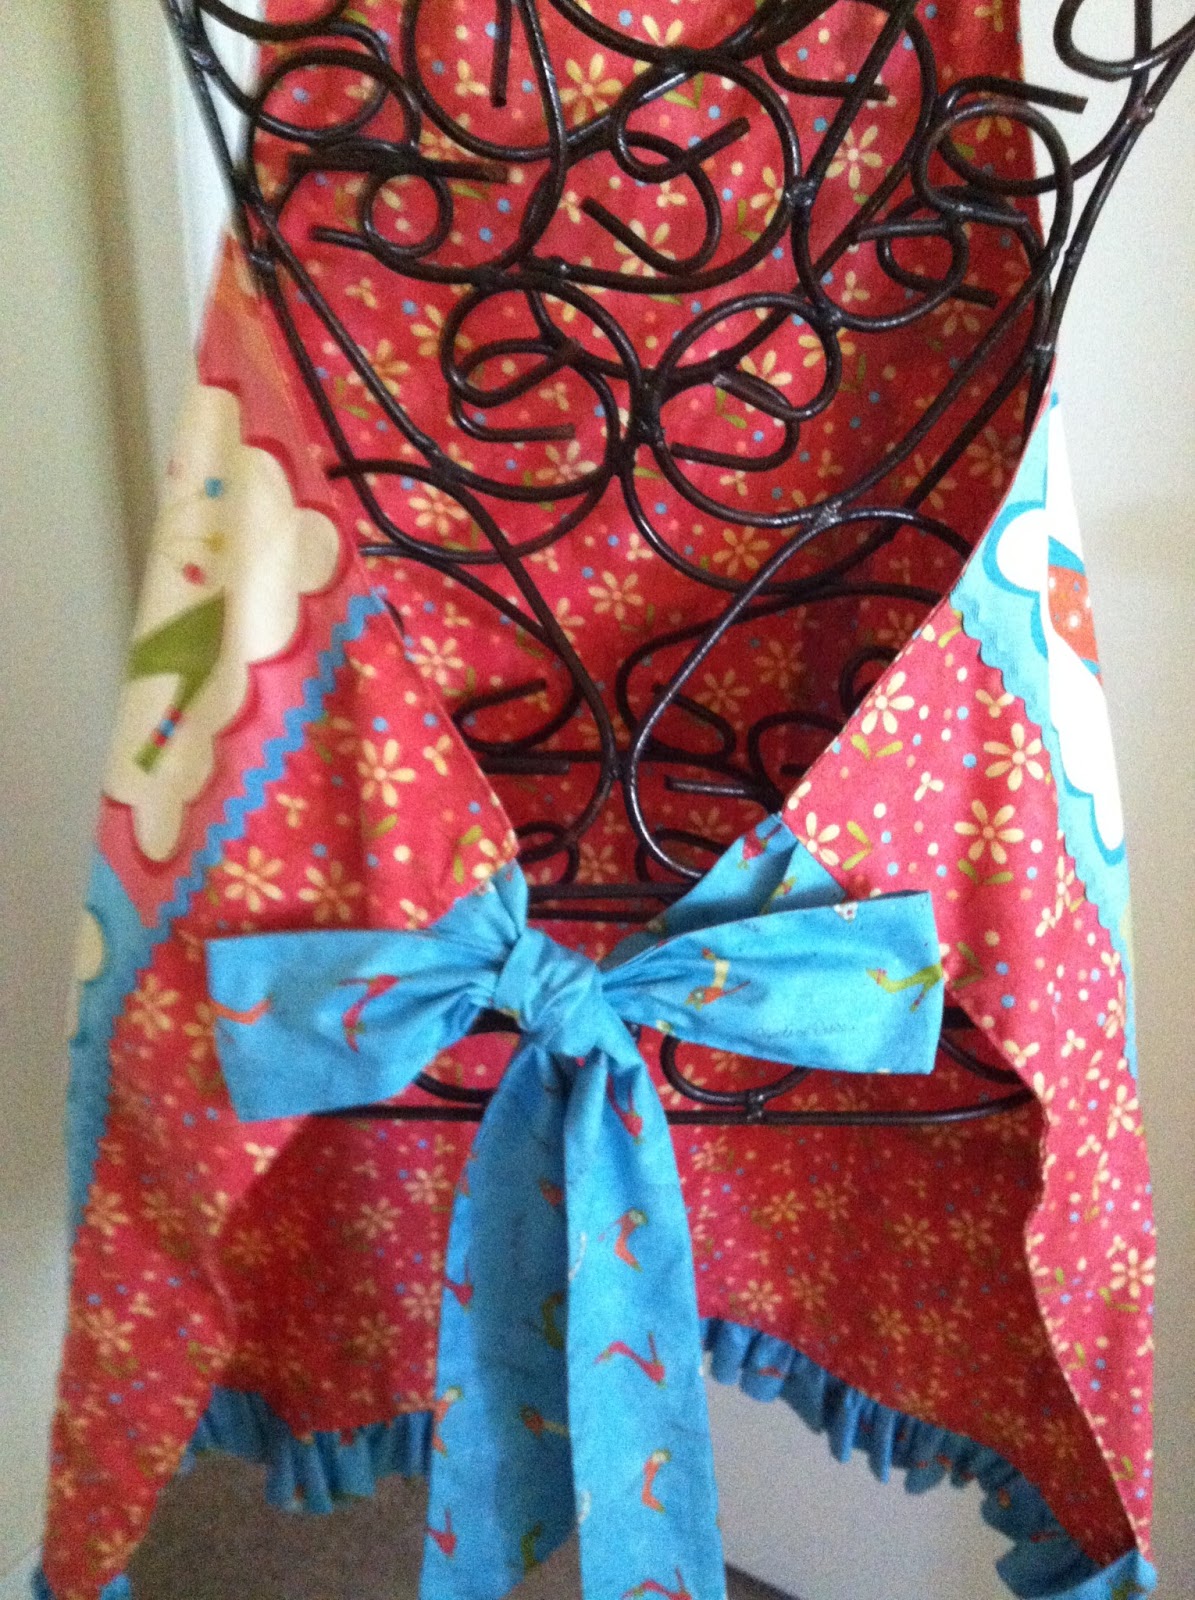
This darling shoe apron is
one of my designs sewn with three coordinating fabrics from a great collection.
When I purchased the fabric I had no idea what I was going to use it for, I
just fell in love with it so I bought it and the fabrics became part of my ever
growing stash. I wanted to use all three of the prints so I picked the panel
for the front and the smallest print for the lining with the tiny shoe print
for the ties and ruffles on the top and bottom.
I did not include a pocket because I chose to embellish the apron with
complementing buttons and rick rack to bring out the pattern and colors giving
it some added dimension. The apron is lined to add weight and extra body, not
to mention good protection for my clothing while I am cooking, always a good
thing for a messy cook.
This little diva shoe apron
was meant for cooking and compliments, thanks for letting me share it with you
today. There will be more aprons
featured in a few days, the next one has some real retro flare and is one of my
favorites.
See you soon.
Laurette
You might also like:
Apron A Day 1, 2, 3 & 4
(Archives 2012 for 1, 2&3)
Wednesday, January 9, 2013
Apron A Day #4
Today’s apron is not one of my own designs it is a retro
inspired 1940’s apron by Heidi Sheneberger.
This was the first apron I made in several years, it reminded me of the
one my Grandmother Sota wore while cooking holiday dinners. I chose three coordinating retro prints,
jumbo rick rack and antique buttons to complete the look of the 1940’s; it is
one of my absolute favorite aprons to wear.
The little green and white buttons came from the first flannel nightgown
I made while in Junior High, I salvaged them when I wore out my gown. I think
those were the first buttons I ever picked out by myself and I paid for them from
my babysitting money, I still have the rest in my button box; I guess I was
into recycling even back then.
Thanks for letting me share my retro 1940’s apron with you,
look for more adorable aprons to appear on my blog in the very near future.
See you soon.
Laurette
You might also like:
Apron A Day #1,2 & 3 - 2012 archives
Friday, January 4, 2013
Toy Room Makeover Reveal
I finally found a few minutes
to post the before and after photos of the toy room makeover we did for our
grandchildren’s playroom. The room has
been used several ways until we decided the best use of it was going to be a
playroom. We sanded and painted the walls, built benches and bookcases, made
curtains and cushions for the benches and decorated it. There are still a few little projects left to
finish but I did not want to wait any longer to share this project, so here are
the before and after shots of the room.
Before & After:
Initially we had a bed in this corner which our oldest granddaughter slept in when they came to town to visit. After they moved back home we put a play size table and chairs there, now we have the storage benches, a wall mural and a high shelf for books and toys they are to young to play with yet.
After
Before
Initially we had a bed in this corner which our oldest granddaughter slept in when they came to town to visit. After they moved back home we put a play size table and chairs there, now we have the storage benches, a wall mural and a high shelf for books and toys they are to young to play with yet.
Before
Before
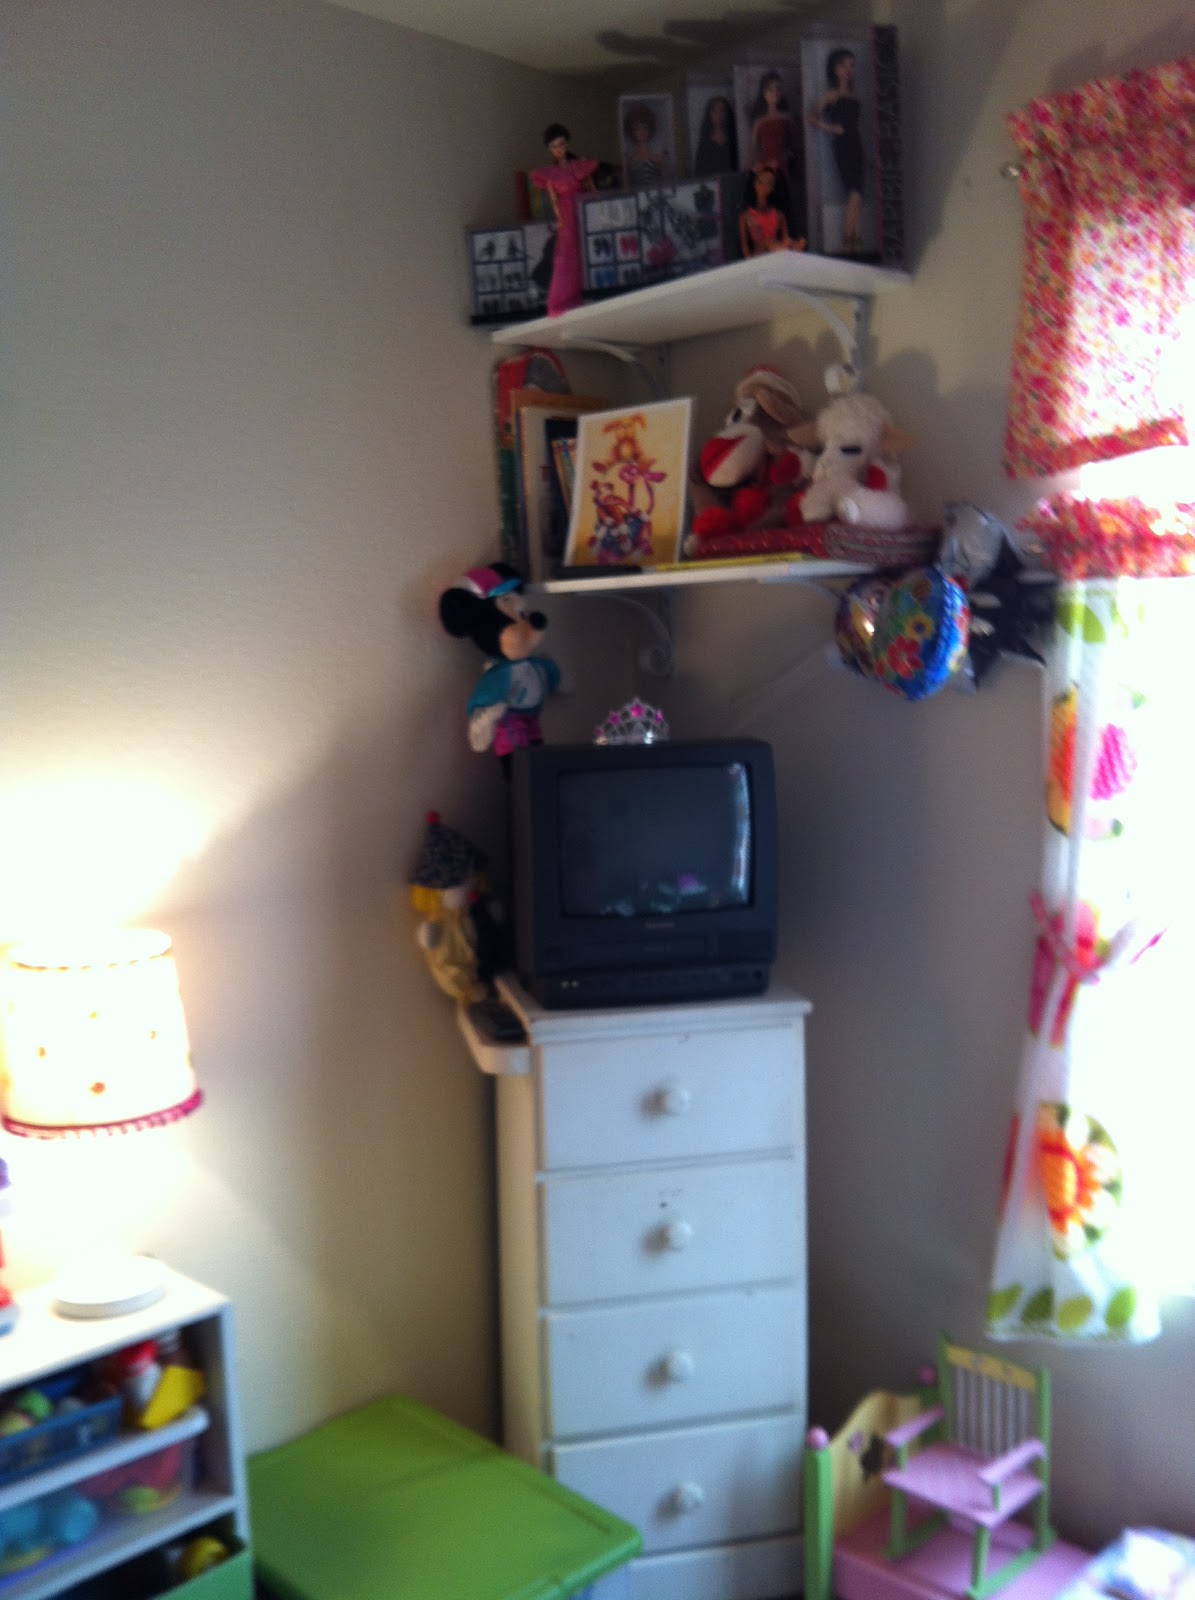
These
shots show the opposite corner, the old dresser with a TV on top and the
bookcase with toys crammed into it, always a mess. Now the toys are organized
by age group and type, a clean look and easy to use and clean up. On the top
two shelves in the corner is the art center which can be brought down when the
oldest wants to make a few new creative projects. The child size table and
chairs will be placed on the carpet in the center of the room once I finish repainting
and varnishing them, it got cold and wet so I had to set that project aside for
a while until my outside studio warms up a bit allowing the paint to dry.
Thanks
for letting me share the toy room makeover, we are very happy with it and so is
my oldest granddaughter, she already loves playing in there.
The New Year: "2013"
With this new year I am re-evaluating
my blog and where it will go from here, I think there will be some major
changes on the horizon but they are not finalized as of yet so you will have to
keep reading to see what’s going to happen next. See you soon.
Laurette
You
might also like:
Toy
Room Makeover Projects
Toy Room Makeover – 1, 2 & 3 Enjoy!!
Wednesday, January 2, 2013
Happy 2013
Hello everyone, just wanted to wish each and everyone of you a very Happy New Year!!!
This is the time of year I usually evaluate all my goals from the previous year to see how I did with everything I planned. After looking at what I accomplished I was very happy with my progress, I did not get to everything but some things far exceeded my original goal, so overall I am a very happy camper. This year my goals are a bit different in some categories and the same in others with new ones being added as I plan out my year, I am very excited about the coming months and can't wait to get started. Here is a clue to one of the new projects I am already working on.
A Time to Blog:
It was a real privilege to have so many of you follow all year long as I began my very first blog, you hung in there through a few technical problems and several unforeseen absences, what a crazy year it was, I am so blessed to have shared it with all of you. As many of you know I was having issues with Blogger/Google and could not resolve them last year, as far as I can tell I think things are worked out, time will tell, so for now I will not have to start a new blog but I will be reworking this one to avoid future problems. You may see changes to the format and the amount of photos I use to help prevent the same errors with the exception of the tutorial posts which will still have the right amount of pictures to help you with your own projects.
I am looking forward to sharing all my projects with you as I complete each one. I want to wish each of you a very creative and fun filled New Year!!! Look for my first post for 2013 this Friday.
See you soon.
Laurette
This is the time of year I usually evaluate all my goals from the previous year to see how I did with everything I planned. After looking at what I accomplished I was very happy with my progress, I did not get to everything but some things far exceeded my original goal, so overall I am a very happy camper. This year my goals are a bit different in some categories and the same in others with new ones being added as I plan out my year, I am very excited about the coming months and can't wait to get started. Here is a clue to one of the new projects I am already working on.
A Time to Blog:
It was a real privilege to have so many of you follow all year long as I began my very first blog, you hung in there through a few technical problems and several unforeseen absences, what a crazy year it was, I am so blessed to have shared it with all of you. As many of you know I was having issues with Blogger/Google and could not resolve them last year, as far as I can tell I think things are worked out, time will tell, so for now I will not have to start a new blog but I will be reworking this one to avoid future problems. You may see changes to the format and the amount of photos I use to help prevent the same errors with the exception of the tutorial posts which will still have the right amount of pictures to help you with your own projects.
I am looking forward to sharing all my projects with you as I complete each one. I want to wish each of you a very creative and fun filled New Year!!! Look for my first post for 2013 this Friday.
See you soon.
Laurette
Sunday, November 25, 2012
Photo Troubles
It looks like I have run into photo storage problems with Google which will not allow me to download photos from my files into the blogger program so I can share them with you. I am not sure if there is a resolution to this problem, if not, I will not be able to continue using Blogspot for my blog hosting site and I will have to wait until the new year to see what can be done to transfer it to a new site, not sure how that works. What a total pain in the behind!!!! Sooo.... I won't be able to share the toy room reveal or the Apron a Day series, or all the holiday projects I had planned.
In case this cannot be resolved:
I wish each and everyone of you a Very Happy Holidays and a Wonderful New Year!!!!
I hope to see you then!!! Look for me on the web in 2013!!!
Hugs,
Laurette
In case this cannot be resolved:
I wish each and everyone of you a Very Happy Holidays and a Wonderful New Year!!!!
I hope to see you then!!! Look for me on the web in 2013!!!
Hugs,
Laurette
Saturday, November 10, 2012
Apron A Day # 3
Today’s spiffy little number
is a black, white and yellow double ruffle, waist tie apron. I made this one of a kind apron for someone very
special but I did not give it to her because she changed her kitchen décor when
she moved away, all before I could present her with her gift.
The apron has a French
Country feel in the colors, double ruffles, black and white bow at the hem and the
antique buttons sewn just in front of the ties in the back. The pattern was one of my designs and the
retro buttons came from my long time button collection. I hope to someday give it to that special
young lady once she moves again and decides on her new kitchen colors, fingers
crossed, if not I may just put it up for sale.
Thanks for letting me share
apron #3, I hope you are feeling inspired to make some aprons of your own for
the up coming holidays. There are more aprons in the series I want to share
with you, the toy rooms reveal and plenty of holiday gifts and decorations so keep
reading, you don’t want to miss all the fun.
See you soon.
Laurette
You might also like:
Apron A Day Series - # 1
& # 2
Thursday, November 8, 2012
Flowers In Pumpkins
Thanksgiving is on the way
and I am way behind getting my decorations completed. I decorate for fall, then Halloween and
finally Thanksgiving which is usually last on my list for making new
decorations. This year after looking at
so many beautiful fall decorations on Pinterest I decided to give a few of the
ideas a try using the inspiration not the exact craft. I wanted some fresh fall flowers to decorate
my porch giving it a pop of color, but as I found out the hard way, the sun
beats down on the porch from sun up to late into the afternoon killing any kind
of plant or flower I put there. I really
wanted fresh flowers and real pumpkins for that space but I was going to have
to settle for faux pumpkins and silk flowers if I wanted the look and color I
saw in those photos.
I gathered up some of my fall
craft supplies and went to work. The first thing I did was to ask my husband to
carve up the pumpkins by using a hot knife to cut the top open so I could
insert the flowers and greens. He went through a couple of blades and some
muscle to carve out the tops, once that was done the rest was a breeze. I think they came out just great and will add
just the right amount of color; drawing all eyes to that small but useful
space.
Look how bright and cheerful
the oranges, reds, yellows and greens look against the tan walls and black rod
iron. They also look really lovely with
the red front door, very eye catching, just the look I was going for even if I
could not use the real thing.
Thanks for letting me share
my pretty fall flower decorations with you, I hope they inspire you to make
some new decorations for your porch, front door or yard to give your curb
appeal a boost. I still have a decoration
or two to finish up for Thanksgiving, I am not sure if I will have enough time
to finish them with everything else I am working on, only time will tell.
Coming soon are more aprons from the series and the toy room reveal, keep
watching for those.
See you soon.
Laurette
You might also like:
Falling In Love With Fall
Fall Windowpane Quilt
Subscribe to:
Posts (Atom)