Showing posts with label buttons. Show all posts

Wednesday, January 9, 2013

Apron A Day #4


Today’s apron is not one of my own designs it is a retro inspired 1940’s apron by Heidi Sheneberger.  This was the first apron I made in several years, it reminded me of the one my Grandmother Sota wore while cooking holiday dinners.  I chose three coordinating retro prints, jumbo rick rack and antique buttons to complete the look of the 1940’s; it is one of my absolute favorite aprons to wear.  The little green and white buttons came from the first flannel nightgown I made while in Junior High, I salvaged them when I wore out my gown. I think those were the first buttons I ever picked out by myself and I paid for them from my babysitting money, I still have the rest in my button box; I guess I was into recycling even back then.

Thanks for letting me share my retro 1940’s apron with you, look for more adorable aprons to appear on my blog in the very near future. 
See you soon.

Laurette

You might also like:

Apron A Day #1,2 & 3 - 2012 archives 

Wednesday, September 26, 2012

Fall Windowpane Quilt


Some of the items I use to decorate my home for fall are fabric table runners, a few are just simple fabric runners while others are pieced quilt style fabric table runners. They do not always end up on the table, some are placed on the entry hall table, shelves and on top of the granite island; I switch them up several times each season.  They add lots of color and set the tone for the color pallet and decorations in that room.  In order to get the look I wanted I had to make my own table runners since the stores just do not carry what I like.  The featured table runner for today is my own design titled; Fall Windowpane.

This pretty little quilt was made up of leftover fall fabrics from two very large Thanksgiving table runners.  I ended up with a bunch of large triangles I had no idea what to do with; I was going to make pot holders for my kitchen.  I sewed two triangles long flat sides together to create a square, once they were sewn together and laid out on my cutting table I saw a table runner.  All I needed was something to create the windowpane effect with; there was nothing in my stash large enough or in the right colors so off to the fabric store I went. I ended up with a completely different fabric then I originally went in for, a green with gold highlights to pull out the green in the leaves, kind of hard to see in the photos but it is there.  I was very pleased with how the table runner came out, this year it sits on the entry hall table, very pretty to look at when you come in the front door.

Thanks for letting me share my Fall Windowpane table runner with you.  I still have more fun fall projects to share as I finish them, in the meantime I will be showing more of those quick and easy projects.

Side Note:  It is the 1 Year Anniversary of the Buttons, Bows & Bling Blog. WOOHOO!!!!!!  It has been a year of total learning and great fun, I have really enjoyed sharing all my creative ventures from my studio with each and everyone of you.  Thank you so much for sticking it out with me, I am grateful for each and everyone of my faithful readers. I am not sure where my blog will go from here or what I will be sharing but I truly hope you will keep reading to see what I am up to next.
See you soon.

Laurette


You might also like:

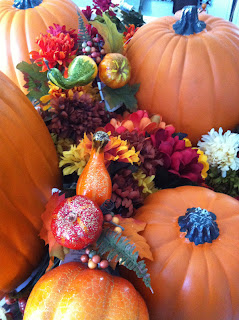
Falling In Love With Fall
Pumpkin Bling
Fall Floral Arrangements


Friday, July 27, 2012

Under Construction


Hello everyone, I wanted to give you a quick update and let you know my blog is under some technical construction while we do some updates and make some small changes, most of which you will not even notice.  A couple of new items will appear, hot buttons for Facebook, Twitter and a few other social networking sites will now be available so you can" Like Us" on those sites, those should appear at the bottom of each new posting. We would all be thrilled if you did that whenever you like a photo, pattern, project or post, don't be shy.  We also have a " comment " button you can click on and make a comment on the post you just saw, if you take the time to comment I will do my best to read it and respond back to you as soon as I can, we love to hear from you. (please note: these hot buttons, appear very small so you will really have to look for them, the size is not in our control).  We at Buttons, Bows & Bling strive to do our very best for our readers so we have joined the social networking scene to have the latest up to date information and ideas, we hope you will join with us in moving us forward in that arena.

Construction should be finished this weekend, I will return with a new posting which I hope will be waiting for you Monday morning, fingers crossed.  Thanks for hanging in there with us this past year as we made our way through a new frontier, we have been having a great time and we can't wait to share more creative projects with you as summer winds down and fall begins.
See you soon.

Laurette

Tuesday, October 4, 2011

Contain That Clutter Part 2

Contain That Clutter Part 2

In part 1, I talked about editing (see past post), Today’s post is about how to organize all those small and large goodies (for me it is sewing notions) using unusual containers.  You are probably thinking here we go again; I have to spend more money on storage boxes, bags and whatever else is out there.  True you may want to do just that but if you are thinking of going a little bit green and leaving a little less garbage in the landfills, then you might find my ideas useful.  Keep in mind I use all these items at my work stations.  I have a working studio with several projects going at once so I have to be able to find things quickly; little stations around the room help me to know where to look for an item without wasting time. My storage solutions do just that, some you will know about others will be new to you. Remember some of this is out of the box thinking.

For my colorful buttons, which I use in my children’s line, I put them into a couple of different kinds of containers. 

For the larger flower buttons; I put them into glass bottles which held Starbucks coffee, I soaked off the labels in very hot water so I could see each button color (love the lids).

For medium and miniature buttons; I used little condiment containers we got   with our take-out soup order.  They all had lids on them which keep those pesky little buttons from escaping and rolling around on the floor.

My specialty, wide ribbons and larger buttons are kept in clear hair spray can tops.  They are deep and clear so I can see the colors and my ribbons don’t end up a wrinkled mess.

All of these items sit on a very old acrylic tray my Mom used at cocktail parties in the 60’s. Totally a re-purposed item, it now serves notions.


A couple of other containers I use to sort and contain buttons are clear glass soup jars, vintage Planters Peanut jars, nut jars from a hotel mini-bar, (paid a hefty price for those nuts) and plastic containers from Kentucky Fried Chicken which hold the side orders.  They are semi clear with snap on red tops.

To store small jewelry findings, seed beads and other small embellishments I use sample glass jars I get from the make-up counter at the department stores.

My bias tape, elastic and piping all go into a fabric covered box which coordinates with my studio colors (black, white & turquoise).


Some of my threads are stored in a large glass cookie jar and a clear plastic mayonnaise jar with a cute avocado green lid.

Extra scissors, a flashlight, nail file and other goodies are stored in a mercury glass flower vase (a gift from my sister).

Glass jars of every kind, glass candle holders and little metal pails hold colored pencils; colored pens, paint brushes, stencil brushes, decorative cutting scissors, paperclips, rubber bands and so much more.  I primarily use glass for easy viewing but you can use any plastic food jars or take out containers you come across.  Pre-made salad containers usually have great shapes and colors and are pretty interesting to look at.

When you are looking for fun containers for storage ask yourself this:  What can I use this for or what can I put in this?  Look at everything you are going to throw out; try to see it in a new and creative light.

Of coarse you can purchase great looking containers just about everywhere, but remember half the fun is looking at things in a new and creative way and using them to make your creative world a little bit more organized.  Oh and don’t forget all the money you could be saving to buy more goodies.

Look for Part 3 of Contain That Clutter; we will be looking at storage for your larger supplies.  See you soon,

Related Posts Plugin for WordPress, Blogger...