Monday, January 30, 2012

Quilted Valentine Table Runner

A few weeks ago, at our Groovy Girls Sewing Club, we were given this month’s free pattern for a quilted table runner and a mystery quilt.  Our teacher, Sheila, demonstrated the first mystery block and showed us a finished sample for the table runner.  Being that I am not an advanced quilter, I chose the table runner as my project and not the mystery quilt. I have so many projects going on I could not see myself doing the large quilt and actually finishing it any time this year.  However, I did commit to making the smaller pattern projects we receive each month and bringing them to show and tell.  I became very inspired by one of the members who brought a different Valentine table runner, which she shared with the group. Since I did not have any Valentine decorations, I thought it would make the perfect project. My five year old granddaughter is expecting some kind of decoration because I usually decorate for every other holiday, why not Valentine’s Day too?  She is so right and I will not let her down.  Go Grandma!  Time to get sewing.


I chose this combination of light and dark to create a nice contrast; it should stand out against my red tablecloth and white dishes.


Everything is cut and ready to assemble, the cutting went really quickly.

The top of the runner is completed, time to machine quilt and bind it.  I think my granddaughter will be very surprised and happy to see it sitting on my dinning room table when it is completed.  It was a pretty simple project which only took me about an hour and a half to complete.  I don’t quilt all the time so I am bit slower then some of you advanced quilters, but I was happy with this part of the finished project and the amount of time it took me to complete it.

Thanks for letting me share this lovely little project with you.  Look for a few more bright and cheery projects in the next post or two.  See you soon.  Laurette

If you enjoyed reading this post you might also like:


Butterfly Mobile
Lampshade Tutorial


Wednesday, January 25, 2012

I Won! I Won!

Oh my gosh I Won!!!  I can’t believe it; I won the Vintage Notions Give-away hosted by Betz White, on her blog.  The fantastic give-away prize was the book “Vintage Notions” by author Amy Barickman; I also won Amy’s new fabric line in fat quarters, produced by Red Rooster Fabrics.  Amy’s fabric is called the Dressmaking Collection, right up my alley since I began my sewing career as a dressmaker, I am one lucky gal.  Amy is also the driving force behind the company, Indygo Junction.  If you quilt or sew you have probably seen all those fantastic patterns or have even sewn with them, I have several myself.  If you go to Betz’s blog page you can view a really great video about Amy, she is so inspiring.  I can’t wait to read the book from cover to cover and create a project or two from the new fabrics.  I plan to share it all with you in my future posts as soon as my prizes arrive.  I am so excited!


If you are not familiar with Betz White, her blog, website or products; she is a fantastic author, designer, and green crafter.  I love her book, Warm Fuzzies, which I really enjoy making projects from, several in fact.  I also have some of her wonderful patterns that I have used over and over when making gifts for my family and friends.  If you get a chance go to her website at betzwhite.com  you can also link to her website from my Follow These Sites list, on the right side of my blog page.  I read her blog faithfully, boy I am glad I do, I am such a fan.  Thank you so much, Betz, for putting on the Vintage Notions Give-away.

Thanks for letting me share my great news and all the creative, colorful ventures from my studio with you.  See you soon, Laurette

If you enjoyed reading this post you might also like:


Craft Lady 
Holiday Beginnings
(All about other talented, creative women)

Monday, January 23, 2012

Butterfly Mobile

I have another easy project to share with you from the toy room I created for my grandchildren.  I call it the toy room because it holds toys, games books and art supplies, which they use when they come over to play at my house, a room all their own.

I wanted to make a mobile that would hang over the bed giving my granddaughter something to look at when she laid down for a nap or before going to sleep at night, when she had a sleep over.  I looked around for one to buy but I just could not find anything in the colors or theme I wanted.  Butterflies and fairies are her favorites and were nowhere to be found, time to make my own.
Off to Michael’s I went to buy my supplies; small quilting hoops, ribbon, clear fishing line and two dimensional butterflies and flowers.  I could not find the ribbon I wanted there; I did find it in my own ribbon stash instead, silly me, I should have checked there first.  I was all set to get to work.

Didn’t this little mobile come out just darling?  I had a great time making it with my glue gun, it was pretty quick, the only difficult part was tying on the fishing line and deciding how long to make each strand with the butterflies and flowers on it.  I am pretty sure I will be making another one, not butterflies, maybe something with a bit of bling for my studio.  This is a really easy, cute project for any room in your house.

Thanks for letting me share this fun project with you.  Look for a few more quick projects from the toy room.  See you soon.  Laurette

If you enjoyed reading this post you might also like:


Lampshade Tutorial
A Bit of Bling
Black & White Bling


Thursday, January 19, 2012

Lampshade Tutorial

When I was working on the toy room for my granddaughters I decided the room needed lots of color if it was gong to be a fun place for them to play in.
As I brought more and more color into the space I realized the cute little pale pink lamp, I had recently purchased, wasn’t going to cut it for bringing in the fun bright elements I wanted for the room.  There were a hundred and one different things I could do to the lamp and shade to perk it up, I finally settled on a quick little project which I could do in about an hour.  Here’s what I did to give the pale pink shade a larger cute factor.

I took the shade off of the lamp and put it onto a two liter soda bottle filled with sand, providing a steady base for working on.


Out came the glue gun and some pretty hot pink pom-pom trim.  I glued it all around the base of the shade, it was looking brighter already.  I was really looking for my retro orange pom-poms but found the hot pink instead; I liked the hot pink better anyway.

Next up was some embroidered daisy trim, which I glued around the top of the lampshade.  A colorful change but not quite enough color, still a little bland, what to do?


I cut apart the leftover flowers being very careful not to unravel the embroidery; I glued them on one by one alternating the colors in a pleasing manner.  I used fabric glue so the glue would not get warm and melt from the light bulb causing the flowers to fall off.

Isn’t my little pale pink shade all bright and pretty, just the pop of color I was looking for.  I really love this little lamp and shade, it was so quick and easy and anyone can make one using a variety of ribbons, buttons and trims.  Try making one for yourself; you will be glad you did.

Thanks for letting me share this quick little project with you.  Be on the lookout for more quick projects from the toy room.  See you soon.  Laurette

If you enjoyed reading this post you might also like:


A Bit of Bling
Pumpkin Bling
Paisley Crazy – Room Makeover
Black & White Bling

Monday, January 16, 2012

Working With Fabrics

For those of you who read my blog on a regular basis, you know I have been working on organizing my studio section by section which has taken me several weeks to finish.  I think I am finally done with just about every large storage project I wanted to complete, I needed to start off the New Year knowing where just about everything could be found.  I still have a few small areas to tweak, those will happen as I work on a variety of projects throughout this year.  Moving things around did lead to organizing several areas of my home and outdoor studio as I went along.  To be honest I still have a few more closets to tackle throughout the rest of the house, I will get to those in the spring when I do the “Spring Cleaning”.


Since I am done with storage and organizing I am back to sewing again, mostly unfinished projects from last year.  My goal for this year is to finish all of my past projects no matter what stage I left them in.  I want to add a new project in between each of the old ones, this way I can make forward progress on the new and the old.  I started off the New Year with the completion of a fabric folio case which could be used to hold a small laptop computer, a tablet or file folders.  One done and so many more to finish.


Next I moved onto making some bedding for my granddaughter’s new dolly bed; the tufted mattress, pillow and sheets came out pretty cute.  I know she will have many hours of fun putting her dolls down for a nap; I can’t wait to see what she thinks.


I just started the process of cutting out zippered eye glass cases from some really darling fabrics.  I had a great time picking out those fabrics from my new fabric wall, which I recently organized for just that purpose, it was so much easier then it use to be.  I am very proud of myself for sticking with that project even though it was overwhelming, all the hard work paid off.  I can’t wait to start sewing up those eye glass cases in the next couple of days.


What’s new for 2012? For me, 2012 is all about fabrics and creating wonderful projects from them using a variety of methods and processes. In addition, I am looking forward to producing my first line of custom fabric designs and textiles to showcase my original patterns and products.  Also on tap this year are more tutorials, painting projects, interior design plans, room makeovers, crafts, restyling/upcycling clothing and so much more. I hope you will follow along with me this New Year as I bring you more colorful, creative ventures from my studio.  See you soon.
Laurette

If you enjoyed reading this post you might also enjoy:


Fabric Organization
Organization Bug
Gift Card Envelopes and Owls

Tuesday, January 10, 2012

Studio - Supply Storage

With all of the organization going on in my studio this year, I am tackling every area, nook and cranny, leaving no space untouched.  Organization and storage are the key words going on all around my home.  Here are a few of the storage ideas I used for my sewing/craft studio, I hope you find them helpful and they inspire you to work on your studio, craft room or office.


On my craft counter I have glass jars of every kind and a metal pail to hold my colored pens, pencils, scissors, paperclips and paint brushes. This puts all of them front and center, ready to use whenever I need them for an art project, I don’t have to look around to find what I want.


Some of my favorite crafting patterns are stored in an open rod iron basket on my sewing counter, a great way to see what I have on hand; I don’t have to hunt my patterns down for a project.  A great way to store note pads or other items you need to find quickly.


I put my scrapbook paper in rolling 12” x 12” drawers so I can easily move them around the room to whatever station I am working at.  The drawers are set up by season and color, keeping the papers flat for better use.  The same drawers could be used for business papers, note pads, extra paper or anything flat I need to store.


These clear boxes are used for project storage; products to be made and projects still in progress.   The clear drawers, on wheels, hold all my beading supplies for jewelry and home décor projects.  All of the boxes and storage drawers can easily be moved around the studio for easy access.  I like all kinds of clear storage containers from glass to plastic so I can see what’s inside, this way I don’t forget what I have and where it is stored.


I love using cubby storage all over my studio; the storage units support each side of my cutting table, run along my windows and are the main storage for my fabric walls.  Easy to build and they always look great no matter what you put into them or on top of them, they come in several colors to match your work spaces.  Here are a few of the storage items I place within the cubby shelves.


I really like the colored fabric boxes specifically made to fit the cubby shelves, they are great for holding patterns, projects, paints, rubber stamps, papers and just about anything else you can think of.  I have them all around my studio, including the closets; I clipped on paper tags, made with my label maker, so I could quickly identify the contents.


All of my resource materials are stored in sections of each cubby by project content or as sources for future projects.  I have tons of books, magazines and patterns which all have visible homes for easy reference.


The clear containers store my rubber stamps and inks as well as several others not shown.  The divided folios usually used for document storage, are used for scrapbook papers and embellishments.  My folios sort my papers and embellishments by color, holidays, events and miscellaneous items.


Because most of these storage containers are see through they can be quite chaotic to the eyes when not in use, I hung a café curtain rod mounted on some cup hooks to slide on a curtain, perfect for covering it all up and to give my eyes a rest from the chaos.  I use the same set-up to cover up my fabric walls when I am not using my fabrics for a long period of time. The curtains keep the light from fading my fabrics and give me a neutral back drop of black and white to work with when I am designing patterns or fabrics.


Thanks for letting me share just a few of the storage solutions I used to organize my Studio/Craft room.  I hope you find my storage solutions useful and inspiring for your special creative spaces and offices.  Look for part two of Studio – Supply Storage in my next post.  See you soon.
Laurette

If you enjoyed reading this post you might also enjoy reading:

Fabric Organization
Organization Bug – December 2011 archive
Control That Clutter Parts 1, 2 & 3 - October 2011 archive
Paisley Crazy Room Makeover – October 2011 archive


Friday, January 6, 2012

Fabric Organization

Happy 2012 to each and everyone of you, it is a new year and time to roll up our sleeves and make things happen in our studios, offices and homes.

Just before the New Year began I rolled up my sleeves and got busy in my own studio, refreshing it by re-organizing my studio fabrics and projects.  It all started with one of my favorite blogs, Pink Chalk Studio, Kathy Mack the author, started sorting all her fabric basics by color, which got me to thinking about my own fabrics and how they were sorted.  The whole thing got me moving on a massive re-organization of ALL of my fabrics and projects, not just my basics.  The project was so much bigger then I anticipated when I began it, wow, what was I thinking?!  It took a week due to the fact I had to stop and take down all my Christmas decorations, pack them up, take them to storage, re-organize the storage unit then clean the garage where they had been stored over the holidays.  Talk about another big project but I can say all the holiday decorations have a home and things are packed away until next year.

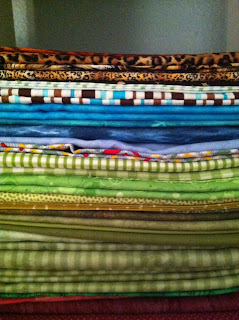
The prints are sorted by dominant color values, basics and holiday fabrics


I now have three cubes; these basics started the whole project.

Back to my fabric organization, it was a challenge since I mainly use prints in my work, lots and lots of prints which made it hard to figure out how to store them in an efficient manner.  I finally decided to sort by the dominant color values and types of fabrics; I did sort all my basics like dots, stripes, checks and solids by color and type.  I cannot get over how fantastic my fabric wall looks and how easy it is to find fabrics and their coordinates.  When I moved into the studio a year ago I pretty much just stuffed fabric into the shelves the best I could to get them out of boxes, but I really did not think too much about how they would work for me.  After being frustrated for so long it was finally time to do something about it.  The new fabric organization was put to the test yesterday, as my studio helper, Jolene and I brainstormed ideas for this year’s upcoming projects, it worked like a charm and I am very happy I put all the time and effort into cleaning it up.


This is only one of my fabric walls, there is another one not shown here, but you get the idea.  My project/cutting table is all cleared off, I plan to keep it that way, at least that's my best intention, we will see if I can do it all year long.

The only downside to the project was a badly sprained wrist from lifting too many fabric stacks and project boxes, one got away from me and took out my left wrist, darn it.  Oh well, I will just have to wait a week or two before I can tackle the 9 feet of storage closets in my studio, they are in much worse shape then the studio fabrics, during the move things got shoved into whatever nook and cranny was available at the time, those closets are a really big project which could take at least two weeks to complete.
In the meantime, I will start working on whatever projects my new wrist brace will allow.  Typing my blog is a real challenge so bear with me if it is a few days between posts while I allow it to heal, I will return full time as soon as I can.

Thanks for letting me share yet another adventure from my studio with you. I wish you and yours a Very Happy and Creative New Year.  See you soon,
Laurette

If you enjoyed reading this post you might also enjoy reading:


Organization Bug - December 2011 archives
Control That Clutter Parts 1, 2 & 3  - October 2011 archives
Paisley Crazy Room Makeover - October 2011 archives
Related Posts Plugin for WordPress, Blogger...