Wednesday, October 31, 2012

Happy Halloween


For those of you who celebrate Halloween, I hope you had a safe and fun day and night.  I got to spend it with my two granddaughters who went trick or treating in my neighborhood, it was fun to see them all dressed up as a cheerleader for the oldest and Tigger for the little one.  Not many kids came by so the lights went off early and here I am writing to all of you. Halloween is over for me, after a quick clean up of the decorations I will move onto Thanksgiving decorating and a few projects for that holiday, which I will be sharing with you as I get them done.

It has been quite an adventure getting back to normal after being gone for ten days, so much to do to get laundry, bills and all the rest caught up so I can go back to my normal day to day life.  I have a lot of projects to share with you, I just need to have the time to sit down and post it all.  First up is the Apron A Day series which should appear in a day or so, I will be sharing other projects in between so I won’t actually be showing you apron projects every single day but pretty close to it which means if I can do it right you will see a post a day, at least that’s the plan.  The photo shoot for all those aprons is completed, I just have to do the writing, easier said 
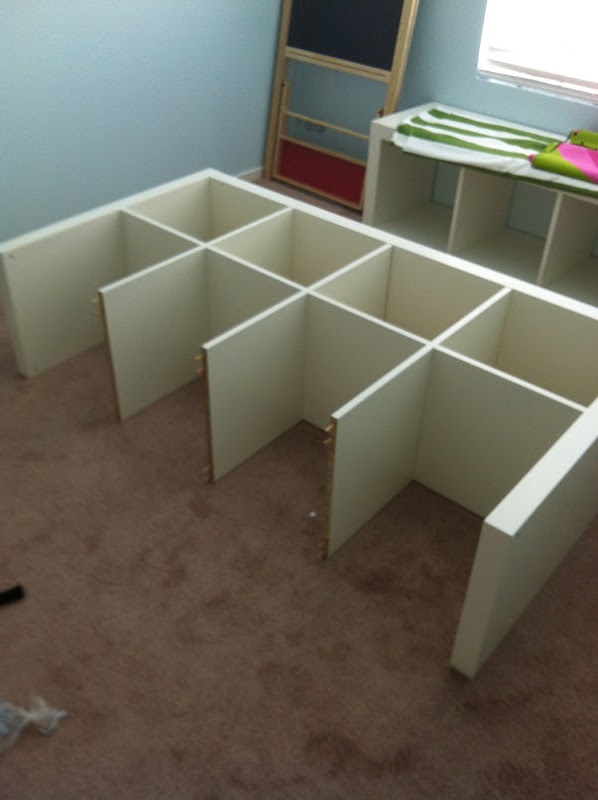
then done but I will give it my best shot. I will also have more toy room projects to post in between all the rest of the other projects. Yikes!!! I better get writing!

I made this little witch doll many years ago when I was making and selling every kind of theme fabric doll imaginable. She is one of my original designs, who knows maybe I will start making them again; everything comes around if you wait long enough.

Thanks for letting me share my posting schedule with you, I felt it was important to let you in on the plans for the next few posts and what to expect.
See you soon,

Laurette


Wednesday, October 24, 2012

He Has Arrived


That special day we have been waiting for finally arrived on Monday morning, October 22, 2012 at 3:00 am. Our first grandson was born in Anaheim, Southern California via emergency c-section; he was 7 lbs, 12 oz and 19” long, his name is Parker. Unfortunately we were not there when he was born but we did manage to arrive several hours later.  We live about 6-8 hours away depending on traffic and how many stops we needed to make, we left at 5:30 am and arrived around 12:30 pm. My husband and I started packing and getting the house ready when we got the call Sunday evening, we packed all night getting only about an hour of sleep then hopped in the car and started our journey, staying up about 36 hours before we were able to go to sleep.  You know what, we are not young anymore and 36 hours is a long time to go without any sleep but really worth it to be able to see and hold our darling new grand baby not long after he was born.  We truly cherish those first hours of our grandchildren’s lives when we get to really bond with them which makes for a very special life long relationship.

Because it was an emergency trip several things got all messed up or forgotten, one of them being my pre-scheduled blog posts of the Apron A Day Series.  I was not able to set them up like I planned to so I can not share them with you while I am away, oh well; I guess they will wait until I get home again.  I think I will be back on track again late next week after I get home and unpacked.  We planned to stay for about ten days but we could not find an extended stay hotel due to some huge convention which hits town this Friday booking up all the rooms anywhere close to our son’s condo. We managed to find a hotel across the street from Disneyland for a few nights, what a great area with tons of places to shop and eat so we will stay until we have to move out on Friday, after that who knows.  Anyway… we are thrilled to be here spending time with our son and his new little family for as long as we can.

Thanks for letting me share the joy we are experiencing with all of you; things will be back to normal very soon, keep watching for the Apron A Day Series and more of the toy room makeover projects, lots of those coming up.
See you soon.

Laurette

Sunday, October 21, 2012

Day 3 - Toy Room Makeover


Day three was all about bringing the toys back into the room which were in there before and pulling out the rest of the toys from storage to see if we had enough room for everything. I must say I had a really good time playing with all the fabric bins moving them around and changing them up over and over trying for a pleasing look to go with the rest of the soft goods going into the room later.

I had a wonderful time sorting toys for the large bookcase; I wanted all the dolls, Barbie dolls, clothing, dishes and books for my 6 year old granddaughter up on the top two shelves and all the toddler toys on the bottom two shelves and in the fabric baskets under the two benches for easy access.

I placed all the art supplies up on a high shelf, out of reach for little hands, so they could be used for supervised project/art time, meaning no crayons or paint on the walls when we were not looking. All the special puppets and antique toys were placed on the highest shelf for easy admiration and to add a pop of color, taking your eyes up making the ceiling look higher then it actually is.


More toddler and infant toys were placed in baskets and shelves under the bench so the little ones could pull them out and onto the floor, great for easy clean up too.  The light weight fabric boxes can be easily transported around the room or downstairs when needed.  Two car track carpets were placed in front of the benches for color, added softness and lots of creative/fun playtime.


There are still several more items to go into the room which are full blown projects.  You are probably wondering what else I could possibly put in there?  I am giving you a few hints with the above photos but I won’t tell you what they go with, you will just have to keep checking in to see what I am up to next.

Thanks for letting me share day 3 of the toy room makeover, the rest of the makeover series will not happen until after our grandson is born and we are back from southern California.  While I am gone I will be remotely sharing my apron a day series, at least that is my plan, I have not done this before so keep your fingers crossed that the technology actually works the way it is suppose to. Giggles!!!
See you soon.

Laurette

You might also like:

Toy Room Makeover – Day 1
Toy Room Makeover – Day 2


Saturday, October 20, 2012

Toy Room Makeover - Day 2


Day 2 was all about putting together the bookcase/bench units we purchased at IKEA several weeks ago.  We purchased two single IKEA EXPEDIT bookcases which could be used in a number of different configurations; ours would be turned on their sides to create very sturdy benches for the adults to sit on while they played with the kids.  Several shoppers at IKEA tested them out with us to make sure they would be safe to sit on, it was lots of fun. That place is a mad house on the weekends, don’t ever go there then, go during the week, totally a crazy but fun experience I would not repeat anytime soon.


These wonderful EXPEDIT bookcases came in very heavy six foot long boxes.  They are the build it yourself style furniture using wooden pegs and an Allen wrench. I must say they are very well built, the pieces are substantial and everything lines up perfectly unlike some of the other build it yourself furniture out there, my husband was impressed with the easy installation of the pieces.


The first two single bookcases went together pretty quickly and before we knew it we had our two corner bench pieces ready to put into place.  Don’t they look great, sturdy too!


Up next were the double bookcases which we planned to put on each side of an existing bookcase we already own and planned to use in the room once it was given a new paint color.  The double bookcases went together the same way just taking a bit longer with double the pieces.


Once we had the bookcases assembled they were much bigger then we thought they would be in width but not as tall as we needed to keep little hands out of the big girl toys they were not ready to play with yet. What to do????  We tried several different configurations but ultimately ended up turning them on their sides and stacking them to gain about four inches in height, which should do the trick.  The bottom two rows are for the toddlers and the top two rows for the 6 year old, an even split.  We had to leave out our existing bookcase and send it to storage for the time being, one less project to paint.

Thanks for letting me share day 2 of our toy room makeover, day three is the beginning of the fun part, decorating the room. There will also be sewing projects and painting projects some of which will have to wait until we return, after our new grandson is born.
See you soon.

Laurette

You might also like:

Toy Room Makeover – Day 1


Thursday, October 18, 2012

Toy Room Makeover - Day 1


My husband and I recently decided to turn our very small 5th bedroom into a dedicated playroom/toy room for our three grandchildren.  So much of our home is not particularly child friendly since just the two of us live here, hence the need for a really safe place for the grandchildren to play.  The room has been moved around and been several things in the last two years, I planned to make it into a beautiful boutique style closet for all my clothing and accessories but we felt for now we needed the playroom more.  Oh well they won’t be small forever and we designed the movable elements in such a way as to be able to use the storage in my boutique closet later. Come along with us on our journey to creating a very cool kid space, here is what we did.


I really detested the wall color and finish on the walls in that tiny little room every time I walked in there.  The color was painted a dirty/pinkish beige with very splotchy textured walls which was applied to cover up a ton of damage and stains, not something we did it was that way when we moved in. No matter what I did to the room to brighten it up with colorful fabrics, toys and furniture it just looked awful.


I am not sure we can do justice to the mess the walls were in with these photos but I gave it a try.  The first thing we did was to take sanding blocks and try to sand down the really rough patches, we found if we went to far the damage and stains started to appear so we could only sand the top layer without getting into re-plastering all four walls, Yikes!  That particular part of the project was a long one because we had to brush down the walls afterwards and vacuum twice. We were smart enough to move everything out of the room first.  Once the room was prepped with blue painters tape we began the real work of cutting in around the baseboards and corners, a long process; once that was done, out came the rollers.  My husband also painted the ceiling which really created a light bright room, the walls are not as smooth as we wanted but we did the best job we could taking into consideration the past damage. With art work, a mural, furniture and curtains not much wall should be showing anyway.

Can you guess what color we chose for the room, we asked my oldest granddaughter what color she wanted to see in there, pale yellow or a light blue?  She chose an icy blue to go with all the other fabrics for the curtains, pillows, bench cushions and furniture we were adding to the color scheme.


I could not get a good photo of the room color just yet but you will see it as we work on it day by day, sorry about that. Not much color in this post, I can guarantee there is plenty of it in all the rest of the posts to come.

Thanks for letting me share day one of our toy room makeover; furniture construction is up next, what a difference those pieces made to an empty space.
See you very soon.

Laurette

I am sorry for the strange font sizes in the pint, sometimes the blogger program goes bonkers on me and there is little I can do to change it without erasing the whole thing. Yikes!****

Monday, October 15, 2012

What Will It Be?


With the passing of the one year anniversary of my Buttons, Bows & Bling Blog came some deep thought as to what direction I wanted my blog to go.  It started out being about all the creative ventures from my studio featuring a wide variety of projects which included sewing, crafting, furniture painting, upcycling all kinds of items and clothing, home décor, landscaping, flowers, recipes and just about anything else I could dream up.

Part way though the year I began to direct my main focus on more creative sewing and showing less of all the other creative projects I was doing. The blog emails from some readers wanted a variety of projects and others wanted to see the blog go all sewing.  As a blogger it is tough to decide what direction is best for the readers and me to keep everyone interested over the long haul.  We bloggers live and write to see positive comments at the end of each page and to have a long list of viewers/readers join our blog, in this arena I am not seeing participation from my readers, making it hard to judge what is popular with all of you and just who is actually reading the posts.

Sewing is my first great love; it is why I get up in the morning and what I think about before going to sleep each night but… without the other creative projects I would burn out and probably quit sewing and blogging.  With that being said I am going to continue to focus on all kinds of projects which include fabric and sewing as well as decorating and crafting, hopefully appealing to a wide variety of readers as well as keeping me entertained. With that being said I will be sharing two project series with you, the Playroom Makeover and An Apron A Day.  I am not sure yet if they will alternate or follow each other, I guess you will have to check in to find out.

Thanks for letting me share my thoughts with you about the direction of my blog. My next blog post will feature day one of the toy room makeover, there are a lot of projects including, sewing curtains, cushions, pillows, a wall mural and few painting projects as well.
See you soon.

Laurette

***If you enjoy reading my blog please take the time to enter a comment and like us on Facebook, it would really help me to keep creating and writing.

Thursday, October 11, 2012

Vintage Inspired Art


Today I have an easy project I want to share with you from my laundry room makeover.  I had quite a bit of wall space in my small laundry area; I was not sure what I wanted to hang on the walls.  I could hang racks for storage or rods for rolls of wrapping paper or all kinds of other organizing items, since I could not make up my mind I decided to make something which would go with the retro theme until I knew for sure what I needed for that space.  Here is what I made.

I needed to keep with my turquoise and red vintage theme so I went through my paper stacks looking for those colors and retro inspired images, not finding enough of the colors I went to Michael's to get what I needed to go with some photos I found from an old engagement calendar.

I went through my blank canvas collection for just the right sizes for the photos and papers I wanted to use.  I chose two sizes and painted them with some of the blue wall paint I used in the room.  Once they were completely dry for a day or two, I used the Mod Podge for paper to adhere each of the printed papers to the canvas.


I let each of them dry for several days before adding the photo pictures to the papers.  This was a pretty easy project but not quick because you need to let the paint and papers dry for at least 24 hours before moving onto the next layer or you end up with a wrinkled mess.  Once they were all dry they were hung up on the wall as a nice collection just behind the door so you see them when the door to the room is closed.  Lucy is one of my favorite actresses from that era and I collect as much of her stuff as I can so having her in my laundry room seems like just the right accessory for that vintage inspired space.

Thanks for letting me share my vintage inspired art with you; there is still one more quick project from that room I want to show you, it should be up next.  We plan to start the toy room makeover this weekend which means there will be some great projects to share with you next week, unless of coarse the baby shows up this weekend, you never know.
See you soon.

Laurette

You might also like:

Retro Laundry Room
Quick Cork Board

Monday, October 8, 2012

Flowing T-Shirt Vest


I am sorry I have been away from my blog for a little bit, I have been dealing with some medical issues and unable to sit and write at my computer.  Things are still not resolved so today’s post will be a relatively short one with more photos then verbiage.  As most of you know I really enjoy recycling old or unused clothing into newer trendy garments, today I am going to share with you how I took a large men’s t-shirt and made it into a flowing vest I can wear with my turtleneck sweaters this winter.


Can you believe this softly draping vest was made with a regular size large men’s cotton knit shirt? It was so simple it only took about 10 minutes to make without using a sewing machine, anyone can make one of these.  Here’s how I did it.


The first thing I did was to cut up the sides along the seam lines using sharp scissors.  Next I cut around the sleeves removing them completely. Be sure you cut off all the old stitching leaving nice clean edges all around. Last but not least I trimmed around the neck starting at the shoulder, don’t make too big of an opening at first, I had to re-cut mine a little bigger so it would fit around my neck and back, if you cut it too large you may be stuck with a baggy fitting vest.


The back view shows two seams which are the old shoulder seams on the t-shirt, one around the neck and one at the middle of the back or lower depending on how tall you are. The opening is what use to be the neck of the shirt, you basically wear it sideways.  For those of you who are visual you can watch a video clip of how to make one on www.wobisobi.blogspot.com which is what I did before making one myself.  This soft vest was so fun and quick to make I plan to make another one in dark grey to wear this winter, I pilfered the green one from my husband’s collection, with his permission.

Thanks for letting me share my flowing t-shirt vest with you; I hope it inspires you to make some recycled clothing of your own.

Now for some news; we have taken on a new project which will last about a month; we are completely revamping our old toy room. It has been moved around and switched up several times since we moved in, after much thinking and debate over what we want to do with that room we have decided to make it into a permanent playroom for all the grandchildren. There will be several sewing projects, furniture painting and building, a new paint color for the walls and plenty of decorating, all of which I plan to share with you as we go along.  Our goal for the finished room is to have it completed and ready to play in by Thanksgiving, think we can do it??  I hope so or the kids will be driving us all nuts when they have no room to play after dinner.  Keep checking in to see how we do. 

Side note:  Our new grandson is due to arrive anytime now, if I am absent for a while from my blog it will be because we have gone to Los Angeles, California for his birth. (We are both so excited we can not wait to hold him.)  I may ask a guest blogger to take over and share photos of the baby with you or share some of her creative blog posts; we will see what her busy schedule allows.  Until then I will try to post at least once a week depending on how my health is doing and when the baby arrives.  Keep us in your thoughts.
See you very soon.

Laurette

Tuesday, October 2, 2012

Cute Onesies Dresses


Time to take a break from fall decorating projects to make a couple of really cute Onesies dresses for my youngest granddaughter, I haven’t made any clothing for her yet, it was way past time to get busy.  I really can not take credit for the idea of making baby Onesies into summer or winter dresses, I saw several versions on Pinterest and decided to make a few dresses of my own.


It was a pretty simple process to take a basic Onesies (snap style body suit, for those of you who have not seen them) and add a skirt. Since my granddaughter is only a year old; I used a 1/4yd of 44” wide fabric, stitched the ends closed, gave it a narrow hem then gathered the waist and stitched it to the Onesies, all done, just that simple.  It did not take long once I got use to the stretch of the Onesies and the lack of stretch in the cotton fabric, it was a bit tricky at first until I got the feel of all the stretchy knit.  The two dresses came out so darling I can not wait to see our baby girl modeling them, I will try to get pictures of her in the dresses, if I can catch her, she moves really fast. Giggles!!!

Thanks for letting me share my latest sewing project with you, I am not sure what is up next, it is just too hot to work on the fall projects and I kind of lost my inspiration on those. I am working on several new patterns and the prototypes for those, which I can’t share with you until the patterns are out for sale. I guess I will have to put on my thinking cap so I can find a project I can share with you.
See you soon.

Laurette


Related Posts Plugin for WordPress, Blogger...