Monday, April 30, 2012

Spring Shed


Hello everyone, I am back, I wasn’t sure if I was going to be able to continue writing a blog with all the crazy events going on in my life. There are still lots of stressful and non-stressful things and events happening over the next couple of months but I found I really missed my creative life.  I didn’t feel like myself without being in my studios creating and sharing all my projects and adventures with you.  I have so many summer painting projects planned for the house and outdoor garden area, not to mention all the great colorful sewing projects waiting on my sewing counters.  There is going to be so much to share with you, I will just have to figure out how to find the time to create and write around all the rest of the craziness of my life.  I thought I would start off with the outdoor shed project we did at the beginning of spring, the one I kept promising to share with you, there are a ton of photos, enjoy.


This was the area we chose to place the shed, it was a pretty space but one which could not be seen from the backyard or out the windows, kind of a blind spot.  I hated to demolish it but it was the only spot large enough to hold the shed and not create an eyesore when looking out any of the windows.


The first thing we did was to remove the storage box, then dig holes on the hill so we could transplant the tree and plants up there instead of dumping them into the green-waste container; the hill is beginning to fill in nicely with all the extra plants, no more baron land. Then it was time to level out the area, but first my husband had to remove a bunch of very hefty roots with a pick ax, they were a good two inches in diameter from the tree next door.  They were heading under the concrete towards the foundation of our home, yikes, that was not a good thing, problem solved.

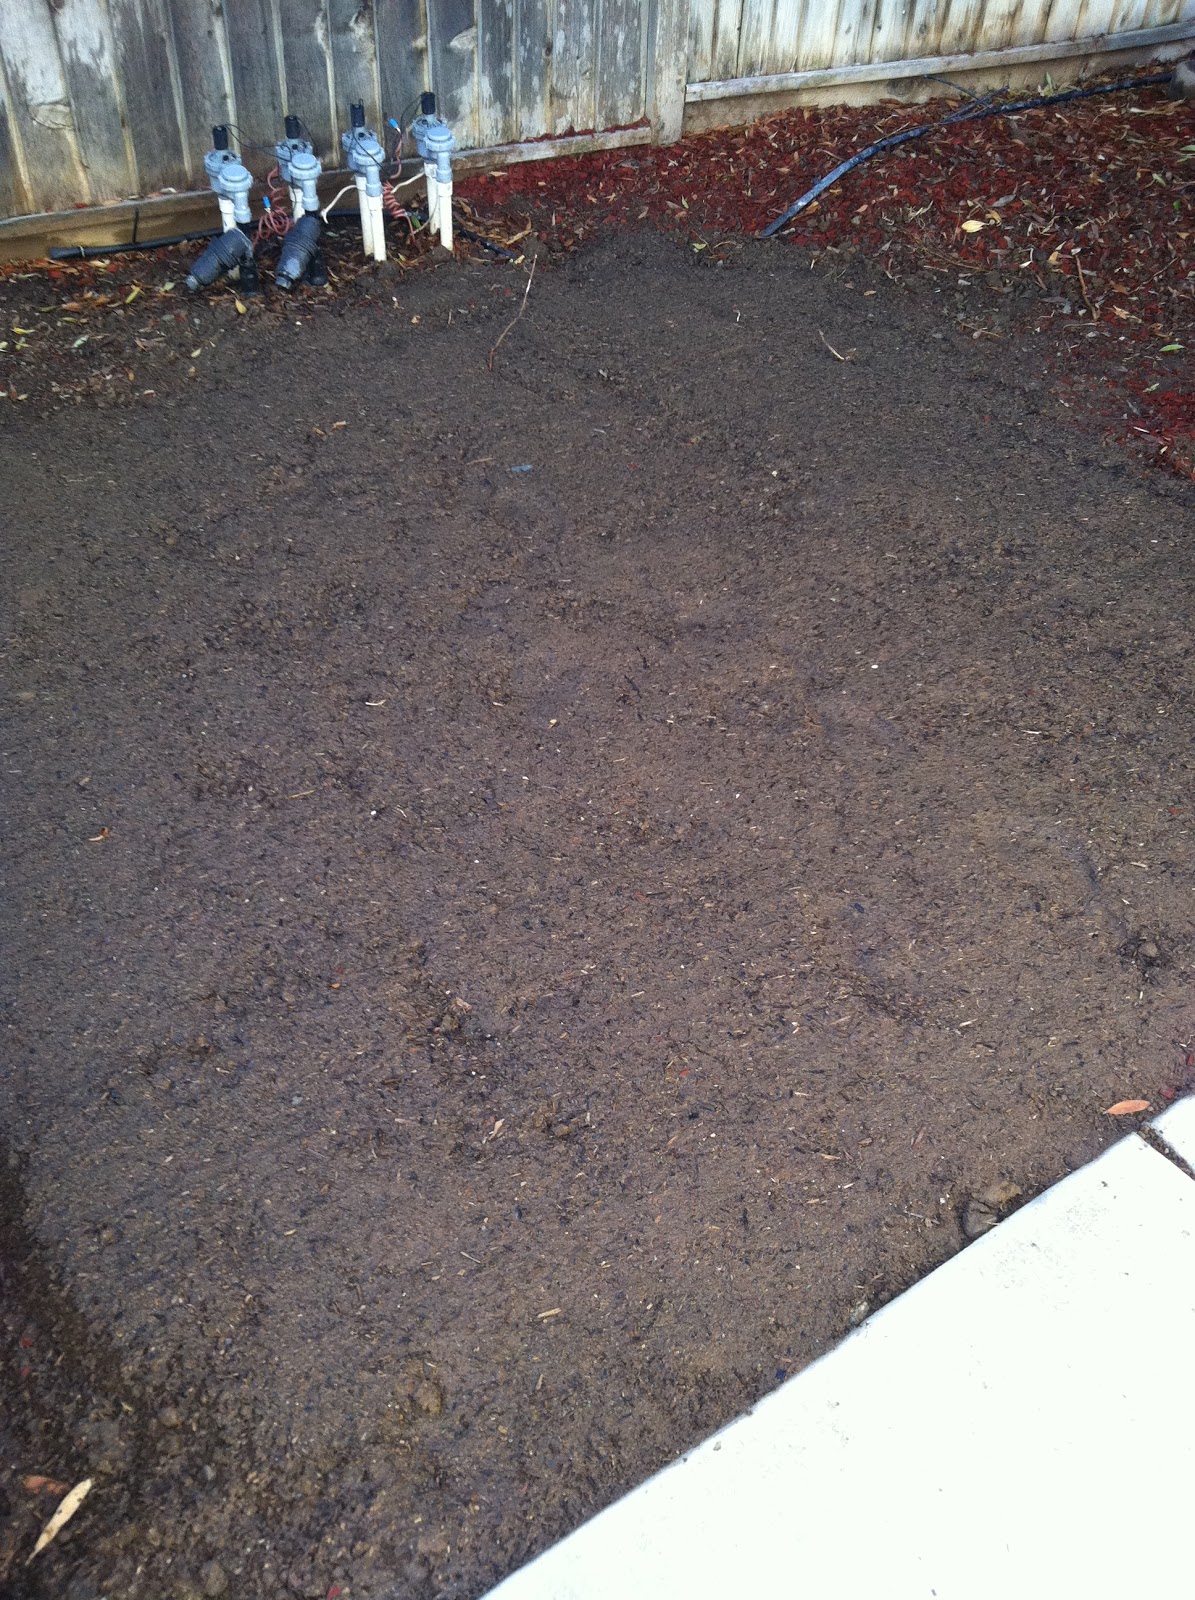
All leveled with top soil and ready to go.


Floor and outside shed frame are going up, a snap and lock kind of thing with a few nuts and bolts to hold it all together.  A super quick process when you go by the numbers.


Here the walls are going up starting with the back wall, then each side, leaving the front open for the doors. The blue tape had the numbers on it for easier piecing, kind of like making a giant jigsaw puzzle.


Time for the roof and doors to be installed by my husband and son-in-law.  I was able to help until we got to the roof, way to heavy and I was too short to lift it up so we recruited some help for this part, thank goodness my son-in-law had a few minutes to come over.


My very happy husband with his new storage shed up and ready to use, did I mention he assembled it in an hour and a half, wow!  I think that is a new record or something, I was a very proud wife.  Now we have all the storage we need for our outdoor furniture, cushions, umbrellas, pillows and extra folding patio chairs, finally.  Our new home was a little short on storage, I was very happy we were able to find the space and solution and get it done so quickly.  Another problem solved, just a few hundred more to go.

Thanks for letting me share our spring shed project with you as I return to my creative life again.  I hope you enjoyed all the photos and it inspired you to tackle a problem solving project of your own.  I am not sure what is up next so I guess you will have to keep and eye out to see what else I may be sewing, planting, painting or decorating.  See you soon.

Laurette


Thursday, April 19, 2012

FYI

Some of my regular readers may have notice my absence from the creative blog world lately.  I will admit life has been a bit stranger then usual with a large amount of unforeseen events keeping me out of my studio, away from my creative projects and my laptop, hence no new posts.  Because I wish to keep my blog fresh, fun and creative I have not been able to write on a regular basis sharing what is happening to and around me.  Don’t get me wrong, not everything is not as I wish it to be, just some of it.  I did manage to plant a few new spring flowers, continue work on our terraced hill in the backyard, re-configure our patio furniture and potted plants to create a better traffic flow on our outdoor patio, buy some new fabric to recover the patio cushions and hang an elegant chandelier over the dinning room table (all with the help of my handsome husband).  Those are just the few things happening in my creative life, the rest is the stressful part, with health issues and family drama keeping me from writing about the fun parts, when I manage to squeeze them in.

One of my pet peeves is following a blogger who just suddenly quits writing and disappears without a word leaving me wondering what the heck happened to her, so I decided I would let you know I am taking an undetermined break from writing my blog, due to all those stressful events.  I really don’t know if and when I will return to posting but I am pretty sure I will find my way back to it when things settle down again.  For those of you who follow me on a regular basis please don’t forget me, keep checking periodically to see if I have returned, and for those of you who follow me by e-mail alert, you will be the first to know when I am active again.

I will truly miss sharing all my colorful, creative ventures from my studio with each and every one of you, thank you for following me this past year as I made my way through this special journey.  Keep watching for me, I plan to return, see you soon.

Laurette

Wednesday, April 11, 2012

Bling Those Shoes - Part 1

While on vacation I purchased these darling Anne Michelle shoes for an obscenely small amount of money.  Can you guess what I paid for them?  Wait for it…..here it comes….a whopping $5.00!!!  Can you believe it?!?
I was so excited, but not for the usual reasons, I did not buy them to wear, I bought them as project shoes.  Ever since I saw several of the shoes Marisa made over, on her New Dress a Day blog, I have been dying to try bedazzling some bling on a pair of stiletto shoes of my own.  I just needed to find a pair with a reasonable price tag, just in case I messed them up.  Even though my knees will no longer let me wear high heals like that, I still love the look and the endless creative possibilities.  I think I may have found a use for all those lonely stilettos stashed in the back of my closet.


I adore the shiny black of the shoes and the darling bows but I feel the bow and high heals could use that certain something extra……a substantial amount of bling should do it.

could not wait to get started; I purchased two boxes of crystal gems, one for each shoe, right after buying the shoes.  After looking at the amount of gems used on Marisa’s tutorial I knew one box was not going to cut it, I am not sure two will do it either, I guess I will just have to see how far I can get with one box each, I have to start somewhere.  I will let you know how it all comes out once I finish the project.  I’ll bet you thought I was going to show you the finished shoe, not just yet.

Thanks for letting me share my cute new project with you, watch for part 2 to see my completed bedazzled shoes, coming your way in the very near future.

(I apologize for the strange multiple font sizes in one of the paragraphs, the blog program seems to have some kind of glitch going on I cannot figure out how to fix.)

See you soon, Laurette

If you enjoyed reading this post you might also enjoy:


A Bit of Bling – 2011
Black & White Bling – 2011

Saturday, April 7, 2012

Easter Project Tutorial

Time has just flown by with Sunday being Easter already, I have a project I have been playing around with for the last week or two trying to finish it in time.  I know it is kind of late, I decided to share it with you anyway, maybe it will inspire you to create something for next year.

For several years I kept pulling out these wooden eggs with the intention of decorating them in some way, either with paint, fabric or paper and every year they sit on my project counter and end up getting put away unfinished, until the next year comes around when I pull them out again.  So silly of me to keep repeating the same thing every year, time to finish another one of those old UFO’s, at least actually start it.

I was determined to actually do something with these beautiful wood eggs, this time I not only retrieved them from the craft closet, I also pulled out an assorted pack of Mod Podge sealers, spring papers, stickers and fabrics (we have progress).


First up were the spring papers, I used some leftover scraps from a card making project I squirreled away for future use.  The paper was difficult to work with and quickly broke down when the Mod Podge was brushed on the outside of the paper to seal it.  Using Sparkle Mod Podge helped to give it some shine and hide some of the damage to the outside print; it also created a nice hard seal giving it a bit of bling.  In hind site I would have cut the paper into smaller pieces and put it on collage style in order to get a smoother finish.  I think I would only put enough Mod Podge on the egg to get the paper to stick, then when the paper was dry, go back and cover the whole egg with the sealer instead of doing it all in one step, less damage to the paper (lesson learned).


Since the paper eggs really did not get the desired effect, I moved onto fabric (leftover scraps from cloth dolls) thinking the light weight texture and flow would do better on the smooth wood surface, boy was I ever right.  After learning my lesson on the first two eggs, I cut the fabric into small pieces using my pinking shears on some and leaving others ragged or straight for texture and dimension.  The process went really well and it was so much easier, not to mention twice as fast. I used a second coat of Sparkle Mod Podge sealer over the first coat to give it a bit of pop.

For those of you who don’t know, Mod Podge acts as a glue and sealer all in one.  I bought my multi pack at Michaels craft store so I could try a variety of different projects.

Here are some tips and tricks for working with this tricky little sealer:

*It gets very sticky the more you handle it and dries pretty quickly; you need to have everything cut and ready to go.
*Use a disposable container you can throw away when you are done. I used small paper plates and some plastic trays from frozen foods and plastic yogurt cups (recycling at its best).
*Make sure your room is well ventilated, it can be smelly.
*I used a small natural bristle paint brush; the foam ones fall apart and get hard pretty quickly.  I washed my brush out with warm soapy water the second I was done with it and let it air dry between coats, once the sealer sets it is permanent and won’t come out. Warm soapy water should work the same way for your hands.
*Place your project on a non stick surface, this stuff sticks to everything, I used an upside down foam egg crate, I think foil might work but I haven’t tried it yet, trial and error are the best way to see what works for you.
*Be sure to pick out the right sealer for the kind of project you are working on, there are different kinds of sealers for just about everything.  My little pack had sealers with a sparkle finish, high gloss finish, matte finish, as well as one for paper and one for outdoor use.

I still have five unfinished eggs, at this point I don’t think I will be able to finish them in time for Easter so they will have to go back into the craft closet until next year (sigh), oh well, at least I finished three of them this time, better then none at all, there is always next year.

Pom Pom Bunnies

I was going to share my Bunny post with you before Easter but I ran out of time so here it is, you get a double post today.


I made all these cute little Bunnies and the Bunny wreath several years ago as Easter decorations for our home, I found them again while going through my holiday decorations and thought I would share them with you this Easter.
I also made the quilted fabric Easter egg sitting in the basket, all the projects were fun to make and fairly simple.  While cleaning out my project boxes in January I found the patterns and all the necessary parts and pieces to make more of them, I think I will try my hand at that again next spring, maybe my daughter would like to help me so she can make some for her children.


Thanks for letting me share my creative Easter projects with you; I hope they inspired you to create some of your own for next year or at least to pull out your Easter decorations to bring a touch of spring to your home for this bright, festive holiday.   

Have a Happy and Wonderful Easter Day.

See you soon.  Laurette


Wednesday, April 4, 2012

Pismo Beach, CA

Hello everyone, happy April!  I am finally back from my vacation on the California Coast.  My husband and I went to Pismo Beach, about three hours south of where we live.  Our trip was purely for rest, relaxation and reflection, absolutely just what the doctor ordered.  I will say it felt good not to use my laptop, my i-phone or any other electronic device or do work of any kind.  We pretty much ate, slept, walked on the beach and sat on the patio of our room on the cliffs and watched the ocean for hours at a time.
I thought it would be fun to share some of the pictures from our hotel, The Cottage Inn, before getting back to all the creative projects I have planned.  Enjoy the ocean breezes.

This is a photo of our room just behind the tree on the bottom floor.

These are the trees right in front of our room, all trimmed up so we can see the beautiful flowers, plants and ocean, and still get a little shade when it is warm out.

This stunning view was taken from our breakfast table, which sat in front of our room window; we ate many of our meals there, mostly breakfast, so we would not miss a minute of the lovely blue skies and frothy waves.

A pretty picture of the English garden landscaping we could see from our outside patio.


The beautiful cliff view of Pismo Beach, the pier and the dunes and a close-up of the cove directly below the Hotel.

Sparking water just before sunset, taken on our last evening, time to head for home.  We really miss the sound of the crashing waves and the spectacular ocean we saw every day, we can’t wait to go back again very soon.

Thanks for letting me share our little vacation getaway, I hope you felt a little of the peace and beauty we had on our very restful trip.  I plan to be back in full creative mode next week, look for me then.  Have a wonderful Easter.

See you soon, Laurette


Related Posts Plugin for WordPress, Blogger...