Wednesday, September 26, 2012

Fall Windowpane Quilt


Some of the items I use to decorate my home for fall are fabric table runners, a few are just simple fabric runners while others are pieced quilt style fabric table runners. They do not always end up on the table, some are placed on the entry hall table, shelves and on top of the granite island; I switch them up several times each season.  They add lots of color and set the tone for the color pallet and decorations in that room.  In order to get the look I wanted I had to make my own table runners since the stores just do not carry what I like.  The featured table runner for today is my own design titled; Fall Windowpane.

This pretty little quilt was made up of leftover fall fabrics from two very large Thanksgiving table runners.  I ended up with a bunch of large triangles I had no idea what to do with; I was going to make pot holders for my kitchen.  I sewed two triangles long flat sides together to create a square, once they were sewn together and laid out on my cutting table I saw a table runner.  All I needed was something to create the windowpane effect with; there was nothing in my stash large enough or in the right colors so off to the fabric store I went. I ended up with a completely different fabric then I originally went in for, a green with gold highlights to pull out the green in the leaves, kind of hard to see in the photos but it is there.  I was very pleased with how the table runner came out, this year it sits on the entry hall table, very pretty to look at when you come in the front door.

Thanks for letting me share my Fall Windowpane table runner with you.  I still have more fun fall projects to share as I finish them, in the meantime I will be showing more of those quick and easy projects.

Side Note:  It is the 1 Year Anniversary of the Buttons, Bows & Bling Blog. WOOHOO!!!!!!  It has been a year of total learning and great fun, I have really enjoyed sharing all my creative ventures from my studio with each and everyone of you.  Thank you so much for sticking it out with me, I am grateful for each and everyone of my faithful readers. I am not sure where my blog will go from here or what I will be sharing but I truly hope you will keep reading to see what I am up to next.
See you soon.

Laurette


You might also like:

Falling In Love With Fall
Pumpkin Bling
Fall Floral Arrangements


Sunday, September 23, 2012

Falling In Love With Fall


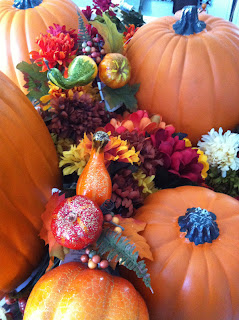
Happy fall, it has finally arrived, of course in some parts of California we don’t really get the kind of fall the rest of the country gets but we do have our own version of it.  I really love this time of year when the light and the leaves begin to change and the evenings and mornings become cooler and just a bit crisp.

The colors of autumn truly inspire me to get very creative in a number of areas which include baking, decorating and sewing.  Recently I made my first trip to Michael's and Joann’s to stock up on fall decorating and fabric supplies.  Thanks to Pinterest I have a ton of fun fall inspired project ideas, of course everything will have my own spin on it but the pin boards really got me thinking and very excited to make some new things to decorate the inside of my home and pump up my outdoor curb appeal.


After my shopping trip I got the bug to set my dinning room table for fall as I do each season.  Out came the rusty orange colored tablecloth, the place mats, chargers, napkins and napkin rings. I also pulled out several of my autumn quilted table runners to place in the center of the table and around the house.


I saw a version of this great idea on Pinterest and decided to make some with the glassware, veggies and candles I already had in my entertaining inventory closet.  I took out the largest wine glasses I had, put the veggies inside, turned it upside down and put a short pillar candle on top, super fun and easy.  I will do a version for Christmas, something a bit more elaborate with lots of bling for the holidays.

I spent today in fall mode by making new autumn flower arrangements for my Mom’s grave site, then putting them in place, everything is all cleaned up and looking pretty again, I feel so much better.  When I got home I was in the mood to bake, I made some delicious caramel cinnamon apple bread, super yummy!  Instead of just making bread I whipped up an Italian turkey loaf for our dinner, which is baking in the oven as I write this, the house smells fantastic; I can’t wait for dinner.

Thanks for letting me share my love affair with fall; I hope it inspires you to do some fall decorating of your own.  Lots of autumn projects to come as long as I can stay healthy, I have been down with a killer upper respiratory infection for the last two weeks which really slowed down the creative and blogging time, fingers crossed.
See you soon.

Laurette

You might also like:

A California Fall
Pumpkin Bling
Fall Floral Arrangements

Tuesday, September 18, 2012

Quick Cork Board


OK, I promised you a quick and easy project so here it is.  I needed a cork board for our little kitchen desk to hold post-it-notes and appointment cards and could not find one the right size which did not cost a fortune, being the crafty lady I am I made one.  Here is what I did.

I purchased some 12 x 12 cork tiles at Staples and a nice brown/black 17”x14” frame with a glass front and a white mat inside, the frame was on clearance at Michael's. The inside of the frame was only 11” so I got out my x-acto knife and my cutting mat and carefully trimmed off the excess.  I was going to remove the glass but decided to leave it and attach the cork to the glass with heavy duty two side stick tape making it sit flush with the frame.  I had a choice to either add another piece of cork or leave it a bit short and decorate the top or use it as a dry erase board for little notes.  I chose some great word stickers to finish off my project, all done, super quick, very easy and half the price.

There were still three cork tiles left in the package so I chose to create a cork board for the laundry room by cutting and attaching the cork tiles to the inside of one of the cabinet door insets.  Using my x-acto knife and the double side stick tape made it another quick and easy project; I got two cork boards for the price of one all in a single sitting.

Thanks for letting me share my Quick Cork Board project with you today, I still have several other quick and easy projects to share with you along with lots of fun fall designs to warm up your home and curb appeal.
See you soon.

Laurette

Wednesday, September 12, 2012

Blue Jean Shorts to Skirt Part - 2


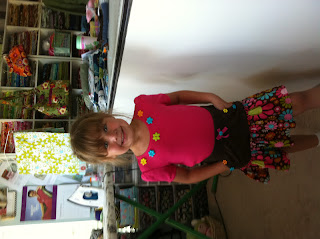
I finally found the time to finish the makeover of the girl’s blue jean shorts into a skirt. This project did not take a lot of time with the exception of the gathering of the two layers of ruffles to fit the new style of the old shorts. Once I had the ruffles ready the rest went very quickly and the skirt was done in no time.  Included in today’s post are the before and after shots and a photo shoot I did with my cute little model, my granddaughter.

Before:


After:

The transformation of the shorts to skirt was much easier then with the pants, just simple cuts up the inner thigh on each leg; carefully cutting through the seam in the center, with old blue jeans the fabric is very thick, a sharp pair of scissors works best.  Next I flattened out the fabric as best I could then cut off the legs to just a little below the zipper leaving enough room to attach the ruffles I made earlier. I was careful to make sure the inside pockets did not get caught up in the seams by pinning them out of the way while sewing on the ruffle. I added some top stitching to the skirt and ruffles to keep them from irritating my granddaughter when she moves around.  I stitched up a narrow fabric belt and tacked it to the back of the skirt at the waistline so the new belt would not become lost in the wash.  I added a few pretty blue buttons to the front of the zipper placket to keep it fun and I was done.  I purchased a new blue shirt to go with the skirt and hand stitched a rick rack bow with a button in the center to tie it into the skirt; the outfit was complete and ready to wear.

Both skirts were upcycled from pants and shorts into bright darling garments ready for their second life in a new form, recycling at its best.


My very happy granddaughter modeling her new outfits, what a cutie!

Thanks for letting me share my upcycling skirt projects with you; I had a great time making them, wait until you see what I can do with a pair of men’s designer jeans, that’s for a later date.  I still have a few easy DIY projects to share with you next so keep watching for those.  I know, I know…, I was supposed to show those today but I was just too excited about finishing the skirts, I had to share those first, thanks for understanding, you will see those next, unless I find a better project to share. (Giggles!!)
See you soon.

Laurette

You might also like:

Girls Pants to Ruffled Skirt
Girls Blue Jean Shorts to Skirt
Sweatshirt to Jeweled Jacket
Sweatpants to Jeweled Skirt


Monday, September 10, 2012

Cabo Bucket Bag


Last Saturday I took the Cabo Bucket Purse making class, I have been waiting for this class since I took the Marissa Bag class on my birthday, part two of my gift from my husband, what a great guy I married.


Just before my class I went to The Nimble Thimble in Gilroy to purchase my class supplies and fabric.  It took a bit of time to figure out what I wanted to use for my purse fabric, with the help of the store owner, Dave and my husband, I settled on Rooftop Garden by Moda, two very pretty fabrics showcasing fall colors in several shades of green, orange, gold and plum. Afterwards I went home to do the pre-class prep of cutting out all my fabrics and fleece, a very long process.


My teacher, Sheila, was great about sharing all her little tips and tricks and had wonderful suggestions for making the purse go together as easy as possible. It was an all day project but absolutely worth every minute, my bag came out fantastic and we had a great time sewing and chatting the day away.  I was totally worn out when I was done but I would do it again, I plan to take a few more purse making classes in the very near future.


The bag is lined with a complimentary fabric with another contrasting fabric for the exterior pocket lining, the button and the interior pockets, there are eight with a contrasting trim.  The bucket bag is pulled into shape by a magnetic closure and held closed with an oversize button. I am very pleased with my new purse; I can not wait to start using it as soon as I break out my fall wardrobe.

Thanks for letting me share my new Cabo Bucket Bag; I had a great time making it along with the Marissa Bag I made last week.  Time to move on and share some of my other projects, I have quite a few to show you, watch for those in the next few days.
See you soon.

Laurette

You might also like:

Marissa’s Bag in Orange
Colorful Fabric Zip Bags (Feb. 2012)
Project Progress (May 2012)

Wednesday, September 5, 2012

Marissa's Bag in Orange


As part of my personal goal for 2012 I committed to brushing up on some of my skills by taking a few classes.  I managed to take several on-line courses, purchased several teaching DVD seminars, go to Groovy Girls sewing club and the monthly mystery block demonstration put on by my local quilt shop. The one thing I still had not done was to actually take a hands on sewing class, time was running out so I finally took one this August while on my break from blogging.  Back in the 70’s and 80’s I made a lot of purses and bags, I haven’t made any since then, using all the new products, so I decided to brush up my skills by taking a purse making class at a quilt shop, The Nimble Thimble in Gilroy, over in the next town, ours closed down this spring.  Our teacher was Sheila Galindo, she was the teacher at our old quilt shop, I was happy to find her and take this class from her; she is the queen of purse making and just the gal to help me brush up my skills.


The first thing I did was to go to my fabric wall and look for a couple of coordinating fabrics to make my bag out of.  It did not take long to find the two darling, bright orange and pink fabrics I wanted to use for my new purse. Once my fabric was picked out I did all the pre-class prep work of cutting out my fabrics, fleece and interfacings and went to class ready to sew.


We all had a great time chatting and sewing while Sheila guided us through all the steps, it was so much fun.  Each bag was totally cute and unique it its own way due to the different choices in fabric.  I can not wait to make another one very soon.

Thanks for letting me share my adventures in purse making, I am taking another class very soon, the next purse is larger and a bit more challenging, just my kind of class.  Let’s hope this purse comes out as nice as the last one. I still have some easy projects to share with you so keep watching for those.
See you soon.

Laurette

You might also like:

Project Progress - (May 2012)
Colorful Fabric Zip Bags - (Feb 2012)

Monday, September 3, 2012

Retro Laundry Room


I am back from my August Break and my week off to celebrate my birthday and our 35Th Wedding Anniversary.  It is unofficially the close of summer and the beginning of the fall season with the conclusion of the long Labor Day Weekend.  It is now time to get back to creating fun projects to share with all of you over the up coming fall and winter holidays.  I managed to work on a few projects and pieces while I was away from my blog, up first is my laundry room makeover. 

The laundry room was just a simple boring beige color with lots of holes in the walls and one cabinet over the washing machine, I absolutely detested that room and I was always embarrassed whenever the door was left open and company came to visit.  I love color and beige was not going to cut it so we went out and looked for something to inspire the makeover.  We went to Target where I found the basic pieces I would use as my jumping off point.  I chose the era and room colors of retro turquoise blue and tomato red from the art piece which hangs front and center in the room.  Here are some photos of the laundry room prior to painting it and the rest are the after shots broken down into segments.

Before:


After:


From all the photos you can see I used only small accents of the tomato red spread throughout the room, the other accents were the oak cabinets and the small wooden laundry wall hanger.  The rest of the accents were all in white with the turquoise blue being the predominant wall color.  The laundry room is now such a bright fun room too walk into, with lots of new storage and great new lighting replacing the old, loud fan light.  I am very happy we spent some of our vacation time working on the laundry room which is part retro but mostly colorful and updated, I love it.

Thanks for letting me share my new laundry room with you, I hope it inspires you to take a look at the space where you do your laundry and consider updating it and making it a fun place to work in.  Remember even a laundry closet, basement or garage could use a bright coat of paint to bring some sunshine into your laundry space no matter how large or small it is. Watch for more new projects all week long, I have some really easy ones anyone can do.
See you soon.

Laurette


Related Posts Plugin for WordPress, Blogger...