Showing posts with label pillowcases. Show all posts

Friday, November 4, 2011

Paisley Crazy - Room Makeover

*Here it is the post I keep promising you, it is a big one with lots and lots of before and after photos of my guest room makeover.  So much to see and share, I debated breaking it up into several posts, but I decided what the heck, just do it, so grab your coffee or soda, sit back and enjoy. Here we go.

It is official, I have gone paisley crazy.  I came across a beautiful set of paisley prints at my favorite quilt shop, Homespun Harbor and just had to have them.  When I first saw the fabrics, I had no idea what I would do with them, they were a mid to large scale size print with some smaller matching prints and the colors were very bright.  I was considering a guest room makeover, in my new home, I hadn’t done anything to the room except drop furniture into it and make up the bed with the linens I purchased for another home. 

As much as I love color, could I be that daring and use those bright new paisley prints in conjunction with the bed linens already on the bed?  Was I that daring? The only other really bright colors were in the toy room, hot pink, and orange, lime green and bright blue.  The answer was “Yes I Could!”  I just had to convince my husband to go along with it, I told him it was just a guest room, not one he would be sleeping in so what could it hurt (unless he ended up in the dog house)?  He didn’t think it was funny but he was willing to work on the room with me (what a great guy).

I used these four coordinating prints in the room on a variety of projects. The fabrics are Gypsy Bandana by Pillow & Maxfield for Michael Miller Fabrics.  These great fabrics also come in a pink, green and red pallet as well as a red, yellow and green mixed pallet.  You will see some of those other color prints in future sewing projects.  I really did go paisley crazy when purchasing this line, I don’t know if I bought every color combination but I gave it a good try. 


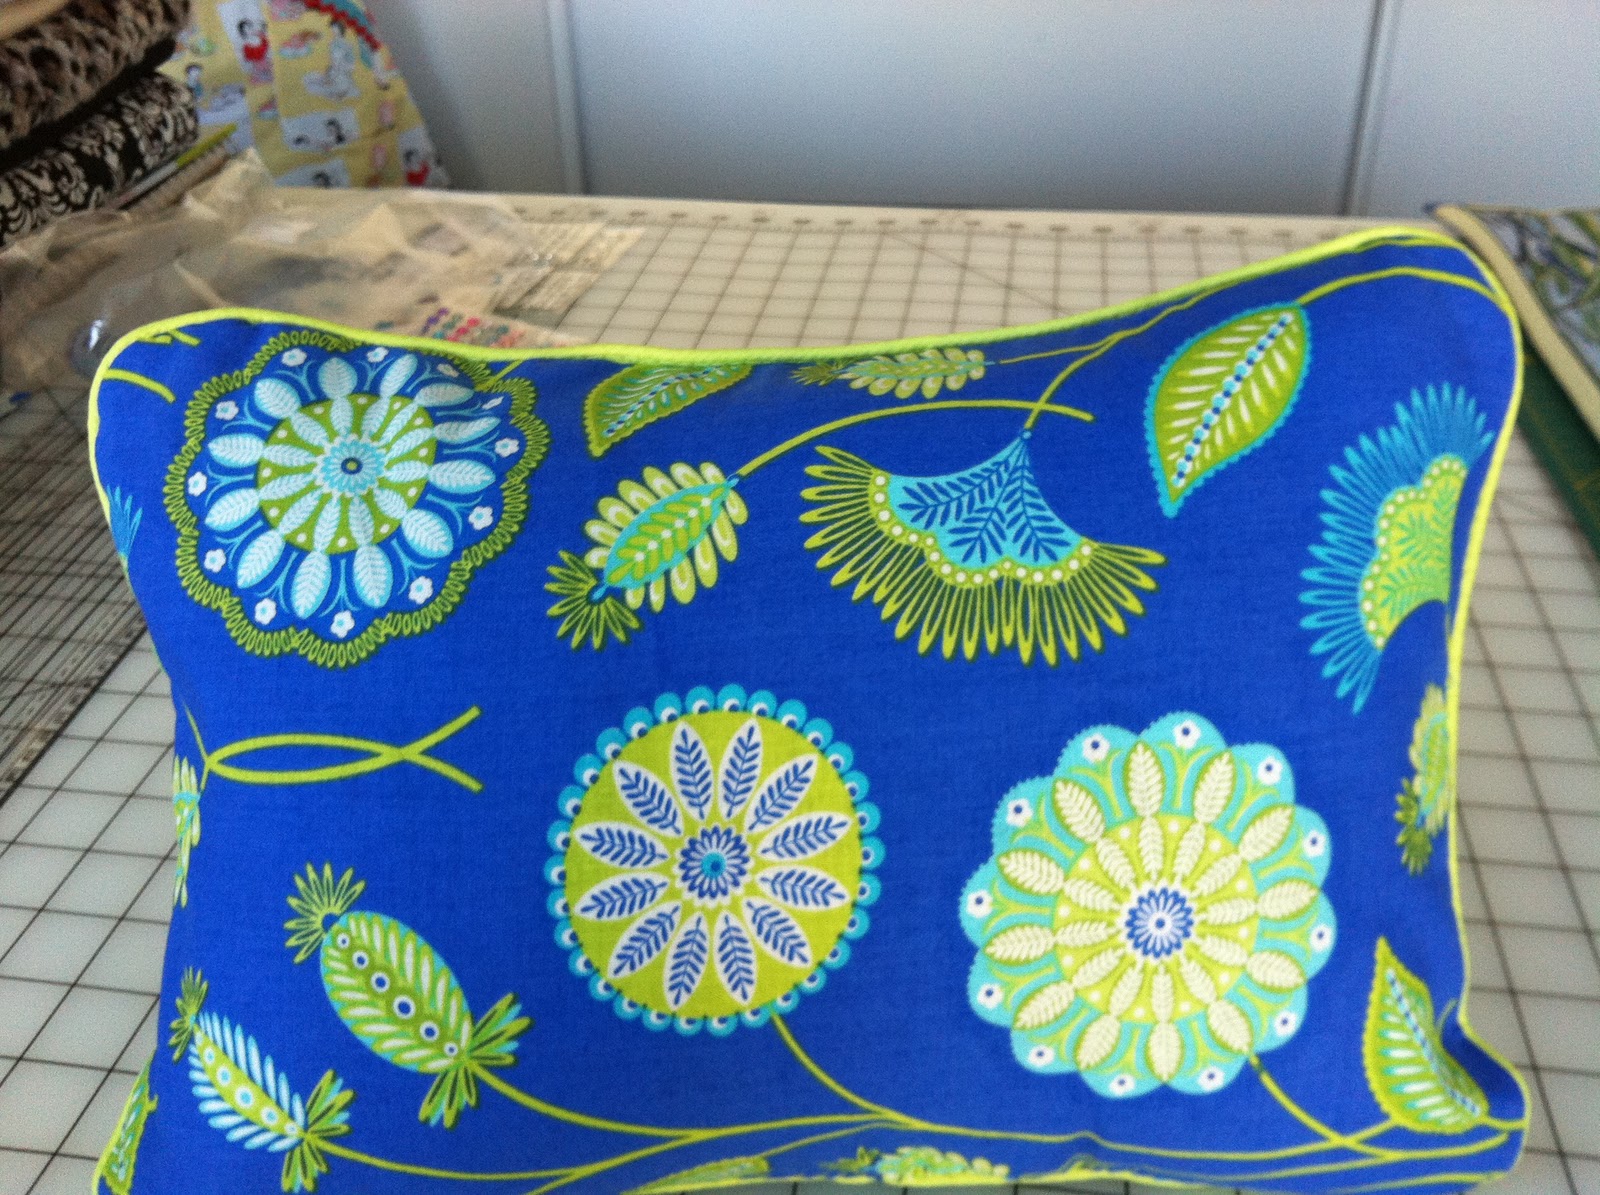
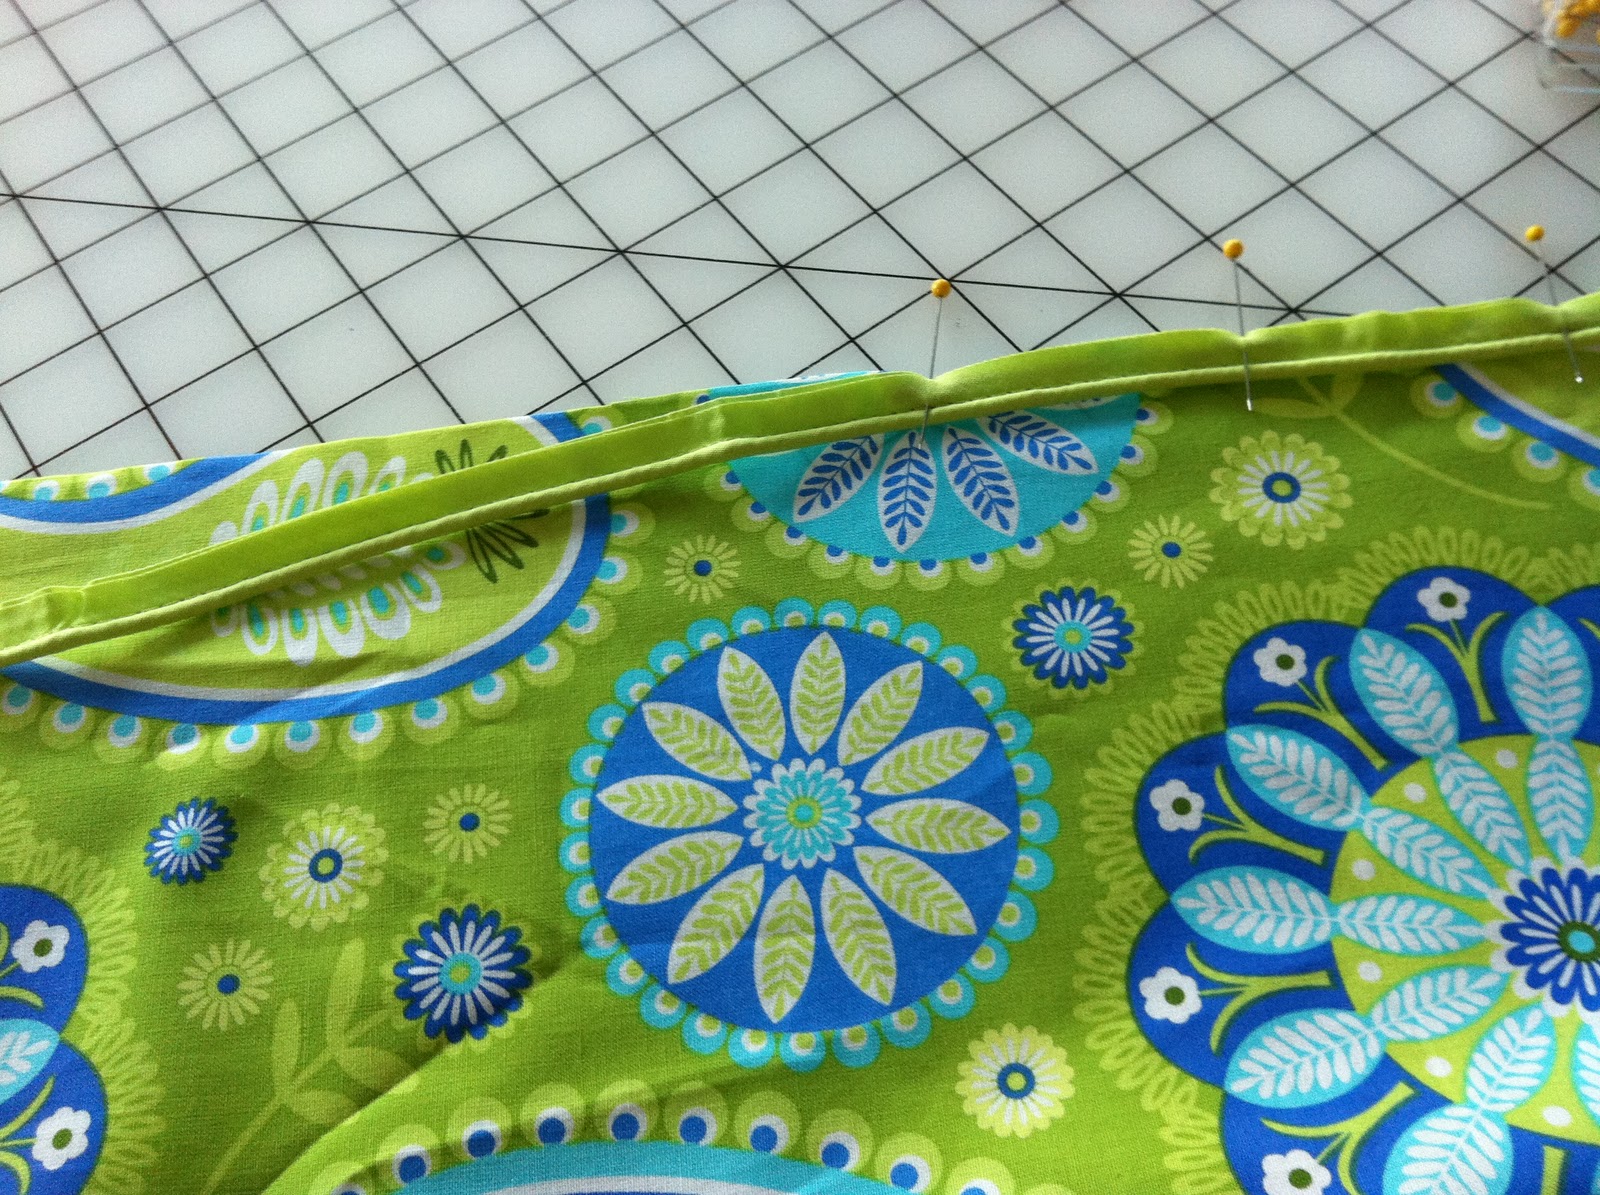
First up is a reversible pillow from two of the blue complementary fabrics.  This little pillow was not the first project I did; in fact, it was the final piece before company came to visit the next day.  Talk about cutting it short.


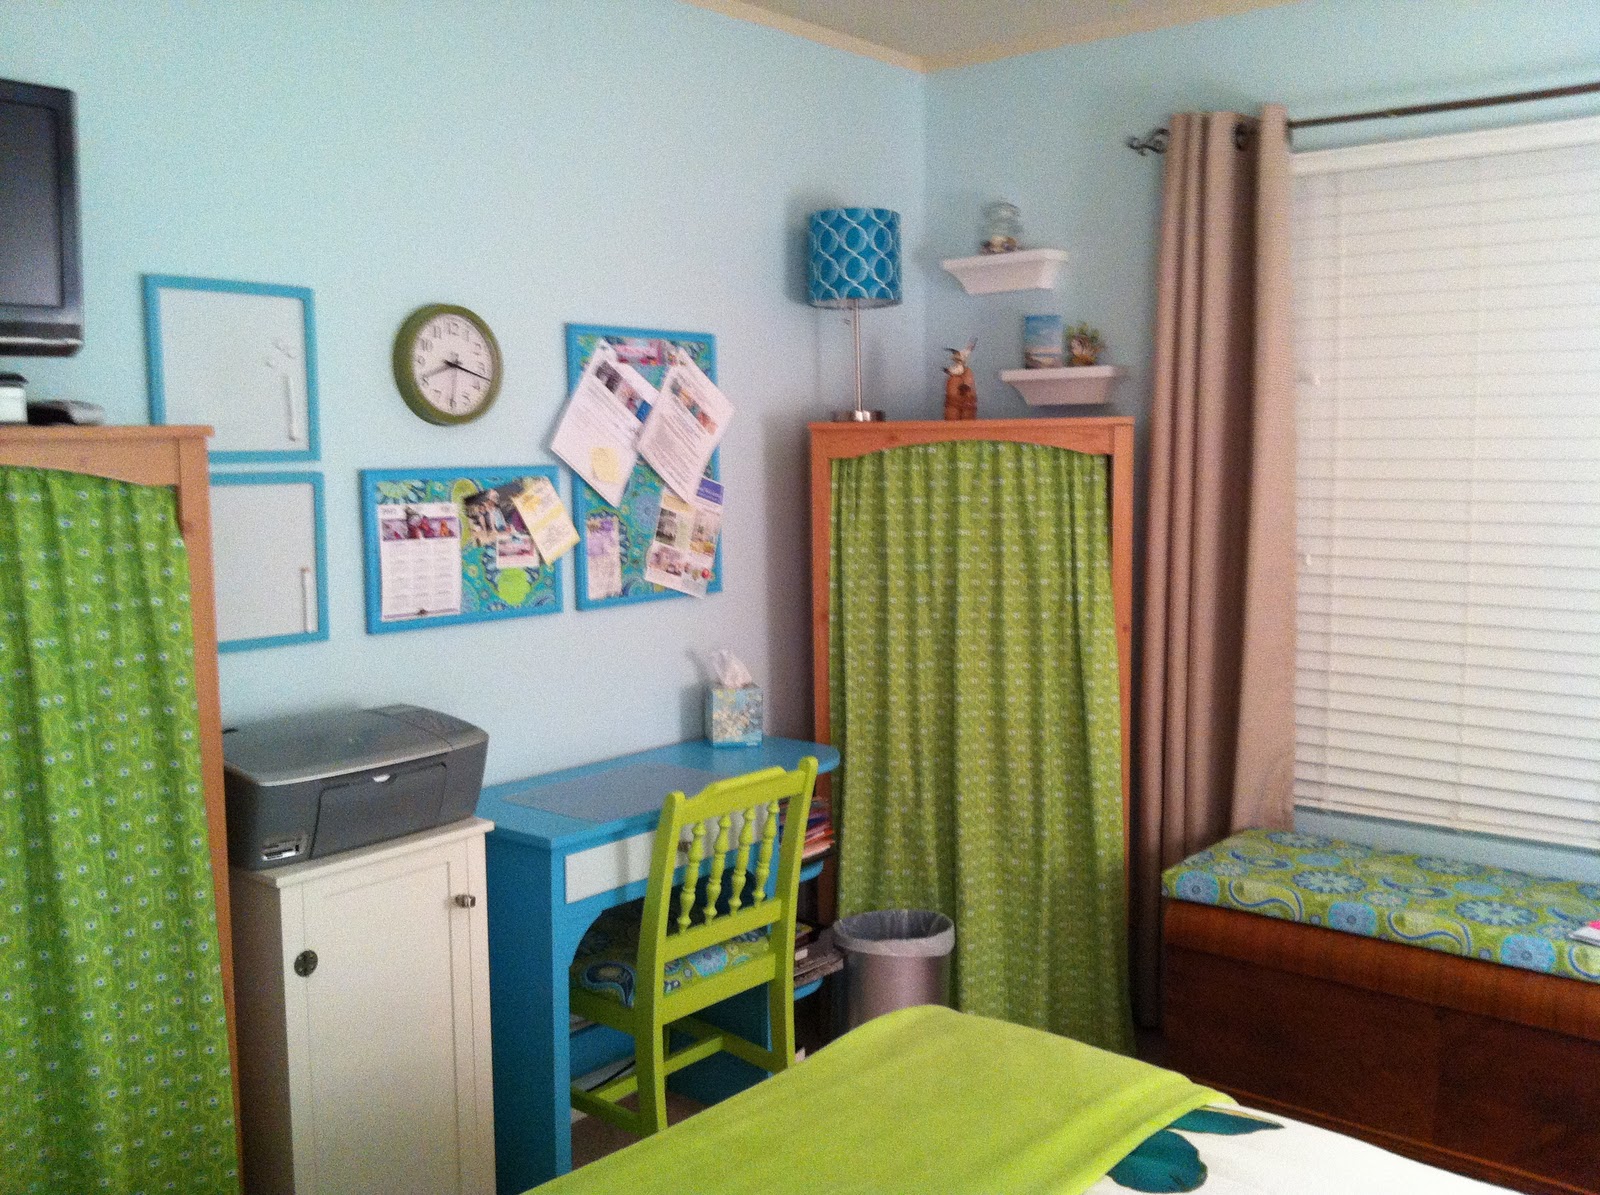
Part of the guest room makeover was due to a relocation of my computer desk from the studio into the rarely used guest room.  I needed a better flow in the studio and more counter space, which meant I would need an office, so we moved it to one wall of the guest room.  This allows for use of all of the upstairs rooms, no empty unused spaces. I wanted to make all the accessories fit into the guest room so they would not stick out, requiring a bulletin board makeover.  I gave two frames a quick re-paint, with paint I had custom color matched, and then recovered them in one of the coordinating fabrics.

Next up was a new cushion for the top of my Mom’s cedar chest; it makes a great window seat on cold winter days.  The green paisley fabric was just the right fabric for the project.


An old chair was given to me by a friend who thought I could “do something” with it.  It sat in storage forever before I decided it would be a good fit for the desk.  This time I used spray paint instead of trying to hand paint all the nooks and crannies.  I pulled up my big girl panties and got to work spray painting it a lime green, oh boy was I stepping out of my comfort zone, but what the heck, it is only paint and could be re-done if I did not like it.


Next came recovering the chair pad with new batting and the green paisley fabric to match the window cushion.

Good as new and looking fun and funky.


The chair was not the only thing in the room to get a makeover, the desk the chair sat at was a complete disaster, it is over 60 years old and it was the desk my Dad sat at to study while he went to law school.  My older sister, I and my daughter all did our homework at that cute little desk and now it was back with me in my office.  The first thing I did was sand the heck out of it with my mouse sander (palm sander), rubbed it down, much better already.


I painted the desk to match the bulletin boards and the lighter blue paisley fabric, very pretty and ready to go back into the room.

Two low dressers were next; they are probably as old as the desk and needed the same treatment as the desk and chair.


This time only the dresser shells got the blue paint, with the drawers all getting the icy blue paint, we used on the guest room walls.  I added silver brushed nickel knobs in place of the old gold ones, very trendy.


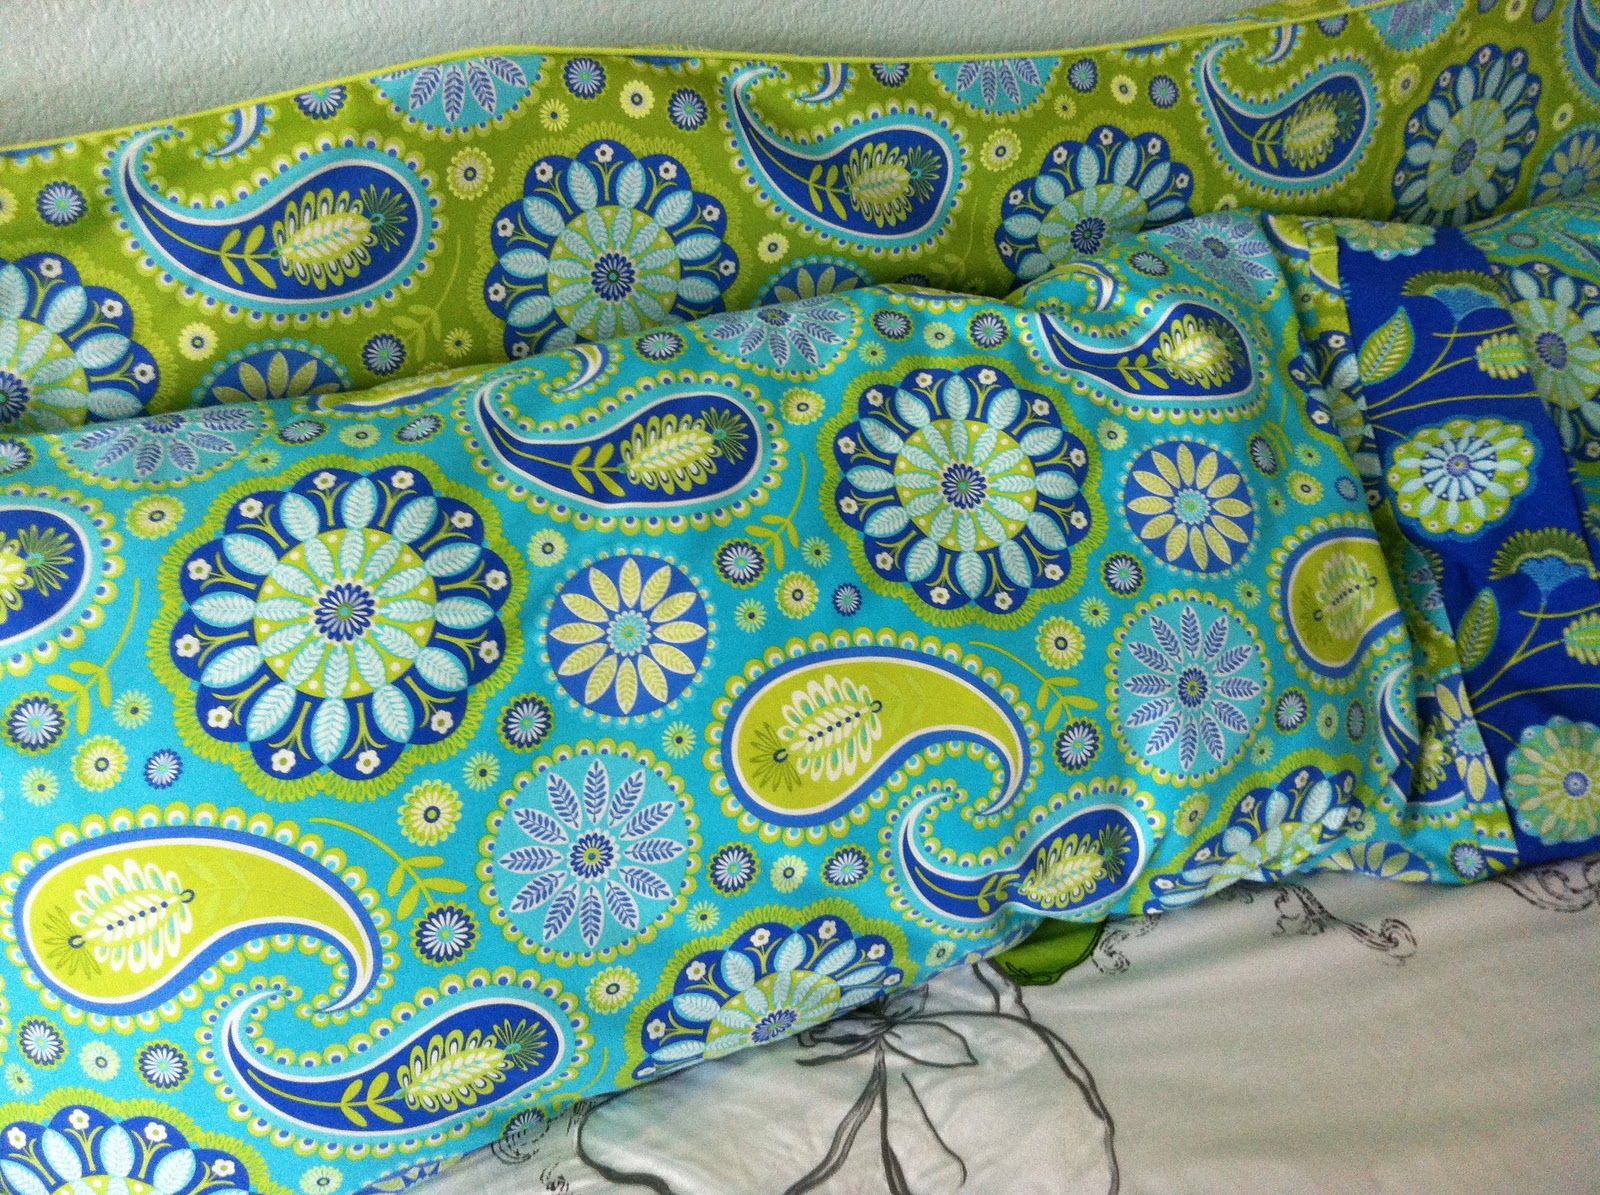
Last but not least was the headboard, it was a wooden style headboard very dated and not good color matches for the other furniture.  I did not want to paint it since it belongs to another set of furniture I have in another room, what to do?I got the idea to make a headboard cozy to put over the wooden one, it could be removed to be washed or to change the look if I got tired of the paisley fabrics.  I used a matching piping along the top edge to give it some body, I was set to go.  I had several extra king sized pillows hanging around so I made custom pillow cases to create a softer headboard to sit against, kind of like body pillows.  See previous post for easy pillow case instructions any level sewer can use.


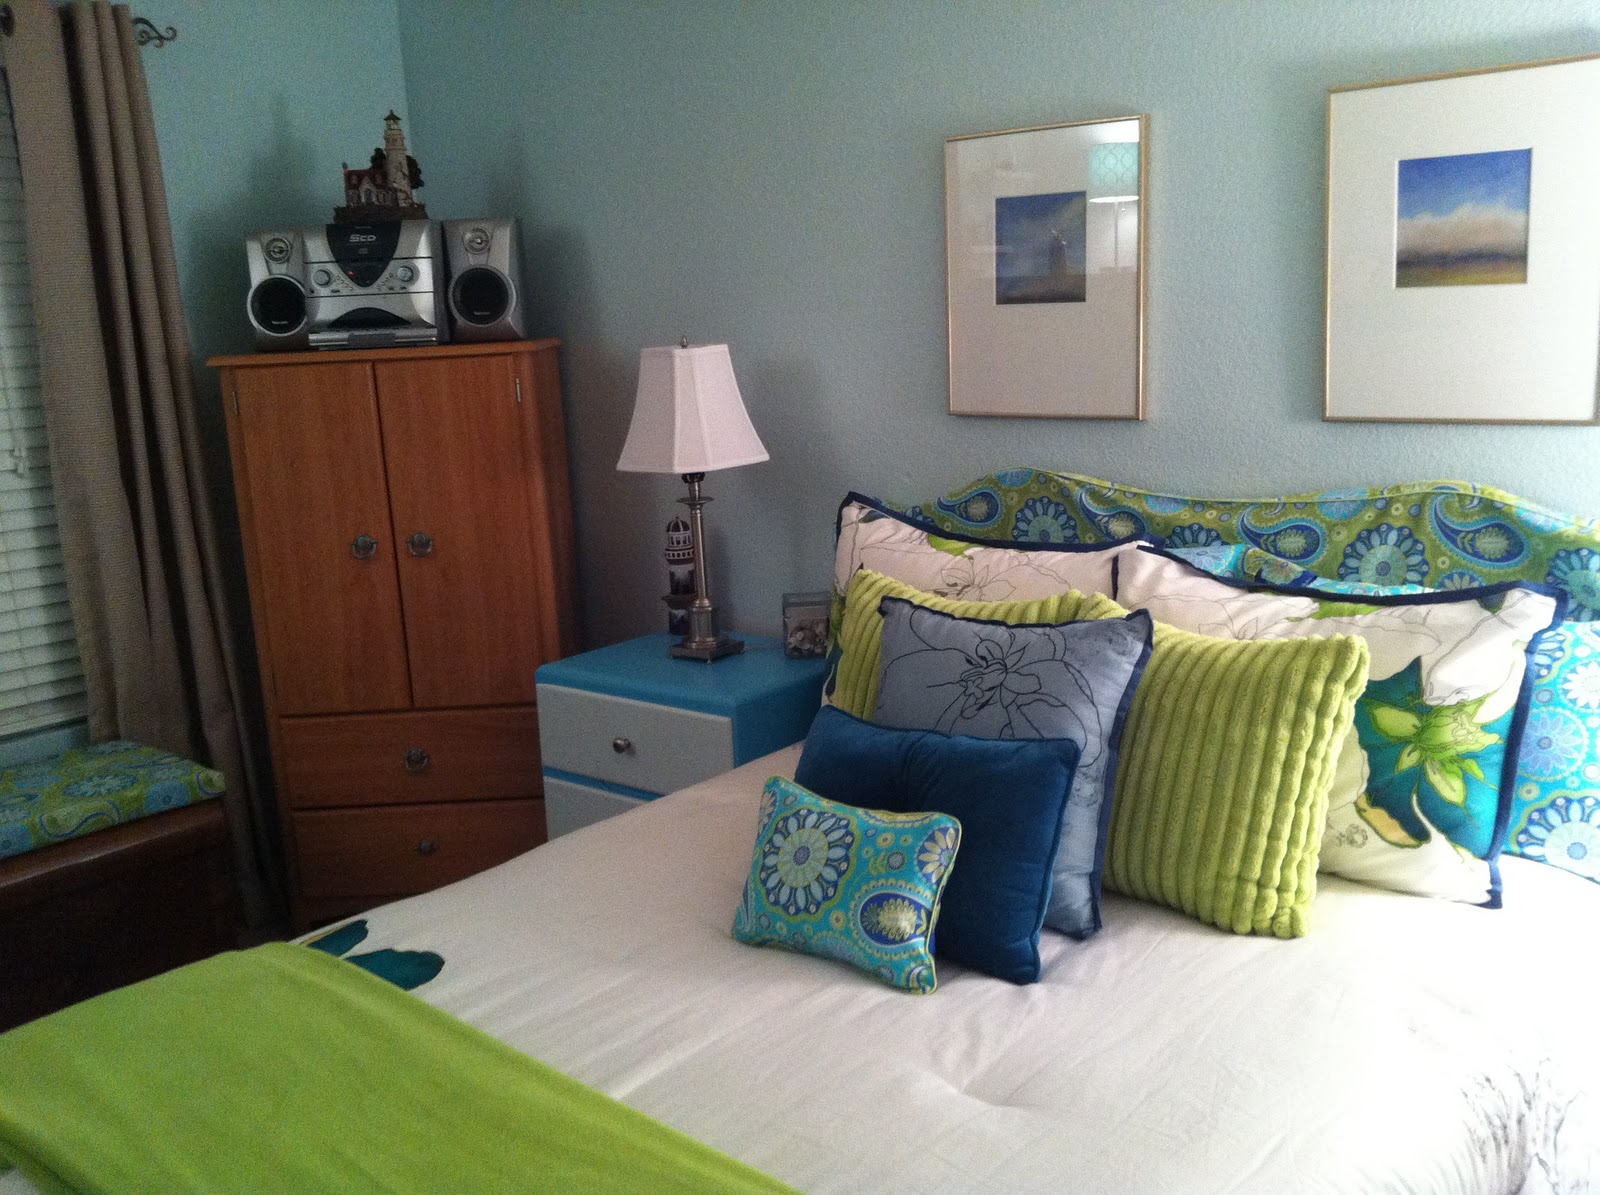
The paisley fabrics really brought life to a dull room making it colorful, fun and trendy, a great place to work and for guests to stay in, no dark burgundy and forest green for me.  Stepping out of my comfort zone was scary but lots and lots of fun to do. After all it is only fabric and paint and can be changed at anytime, but not too soon, I’m still tired from all the work.

Thanks for letting me share my office/guest room makeover with you.  See you soon with more colorful ventures from my studio and a peak into my all time favorite quilt shop.  Lots more creative fun coming your way.


Where to buy:

Homespun Harbor A Quilt Shop
341 Tres Pinos Rd. Ste.101
Hollister, CA  95023
831-630-9438

Custom mixed paint and spray paints:

Ace Hardware
Hollister, CA 95023
Check your local area for an Ace Hardware near you.


Wednesday, November 2, 2011

Get Your Pumpkin On!


For those of you who follow me on a regular basis this is a reminder about the Pumpkin Bling challenge.  Time is getting short to e-mail me pictures of the pumpkins you created for the challenge, there is still a prize waiting for the lucky winner.  Time is slipping away; Thanksgiving is on the way with pumpkin pies to eat instead of decorating them, so get those pictures to me soon.


Just a little light housekeeping:  For the Paisley Pillowcases post; you can also make standard or queen pillowcases, the process is exactly the same, with a change in measurements.  You can e-mail me for the correct measurement if you would like to make a different size and I will be happy to e-mail them right back to you.  If you do make a pillowcase or two, please e-mail me the photos and I will share them on my blog, if I get interest I will also give a prize for those as well.


Just a little peak at my next post on Thursday, it is the guest room makeover. 
Happy sewing and crafting.   See you soon.

Monday, October 31, 2011

Paisley Pillowcases

About a month ago I completed a guest room/office makeover using a pretty set of paisley prints.  One of my projects was to make some custom king size pillowcases for two extra king pillows I had laying around.  King size pillowcases are very expensive and never the right colors to match the décor, I decided to make my own.  Even though there are lots of patterns out there; this is my favorite way to make them, quick and easy.  I use this pattern as a class project with my beginning sewers.  I won’t be using a step by step sewing tutorial here just some dimensions, photos and tips to get you started.  You can e-mail me with questions if you need specific instructions and I will be glad to help you with more details.  Always happy to help a fellow seamstress/sewist.


King pillowcase (1): Approximate finished size is 20” x 40”.

 1¼ yards of 45” cotton fabric for the pillowcase body.

¼ yard of 45” contrasting cotton fabric for the cuff.

¼ yard of 45” third contrasting fabric for the flat trim.

Basic sewing supplies and sewing machine.

If you plan to use the pillowcase to sleep on, pre-wash and press all your fabrics.  When I am using them for decorative purposes only, I don’t pre-wash, keeping the sizing intact giving my fabrics a crisp look and feel.

Before cutting any of your fabrics press out all the folds and creases allowing the fabric to lay flat so you don’t end up with jagged edges when you use your scissors or rotary cutter. 

First up is cutting out the body of the pillowcase to measure out to 37” long by 40” deep, making it 20” wide when you fold it in half the long way.  Once folded it should measure, 37” x 20”. 

Open up the body fabric; lay it out flat with the print side facing up at you.

Next grab your contrasting flat trim fabric and cut a 2” x 45” piece of fabric (the width of the fabric).  Fold it in half with right sides facing up and wrong sides together, making a long strip of printed fabric, press.  Pin it to the width of the body of the fabric you laid out flat, lining up the raw edges, work from the center out as you pin, then cut off the excess ends.

Now do the same thing with the cuff fabric cutting it to 9” x 45”, fold it along the length so the print side is up and you have a nice long strip.  Lay it over both fabrics creating a sandwich with the trim between the body and the cuff fabric.  Make sure all the raw edges are even as you pin working from the center out again.  Cut off any excess fabric.

Stitch your seams in 1/4”, no trimming necessary, and now go back and edge stitch using a zigzag stitch, this way the edges won’t unravel when your fabric is washed.   This is a very important step, don’t skip it or you will have a mass of strings and a poorly made pillowcase, not giving you a professionally finished, long lasting product.  * All your seams will be finished in ¼” seams with a zigzag edge stitch.

Press your seams to set the stitches.

Pull up the cuff to reveal the trim and press it flat. (see photo)  Your pillowcase should now measure at approx. 40” long, depending on how accurate your seams are, a little more or less is just fine and will still fit. (It may be a little tight or loose depending on how full the pillow is stuffed.)

Fold your fabric inside out, right sides together, the full length of the fabric, making a long tube.  You will sew across the bottom and up the side to make your pillowcase body.  Be sure to do your edge stitching to finish off the body.

Turn and carefully press, then iron your pillowcase, for a professional look. It should take you one to two hours to complete each pillowcase depending on your skill set.  The more you make the faster it will go.

Stuff your pillowcase and show off your great new sewing techniques.

To make two king pillowcases you will need:

2 ½ yards of 45” cotton fabric for the body of the pillowcases.

½ yard of 45” cotton fabric for the cuffs.

¼ yard of 45” cotton fabric for the flat trims.

If you are thinking you would love to try making pillowcases but you really don’t need any, you can join the One Million Pillowcase Challenge.  The goal is the donation of one million pillowcases to local charities and was issued by American Patchwork & Quilting.  For details see their website at:
You can find places to donate in your area as well as lots of cute pattern ideas.  My local quilt shop holds a pillowcase making day every year, in December, where we make pillowcases for 8 hours then donate to the local women’s shelter.  It is very rewarding and I have been sewing for charity every year since they started doing it.  You can also make them on your own and send them to the suggested charities on the lists. Lots of ways to help and have fun doing it.

I hope you enjoyed my paisley pillowcase project and you can’t wait to make your own.  Look for my next post, Paisley Crazy, where you can see my complete guest room/office makeover and all the projects I did using the same pillowcase fabrics and other matching projects.  See you soon.


Where to buy paisley fabrics:


Homespun Harbor a Quilt Shop
831-630-9438
Hollister, CA


The information in this article is not a complete pattern or tutorial and is provided for information and entertainment purposes in good faith.  No warranty is provided nor results guaranteed.
Related Posts Plugin for WordPress, Blogger...