Tuesday, July 24, 2012

Baby Shower Bliss


The baby shower my daughter and I gave for my daughter-in-law is finally over; it just flew right by in the blink of an eye.  We truly had a really great time getting ready for it by creating all our projects and then decorating the party spaces with all our goodies.  As promised I have some photos of those spaces all decked out in blue and white, sit back, relax and enjoy!


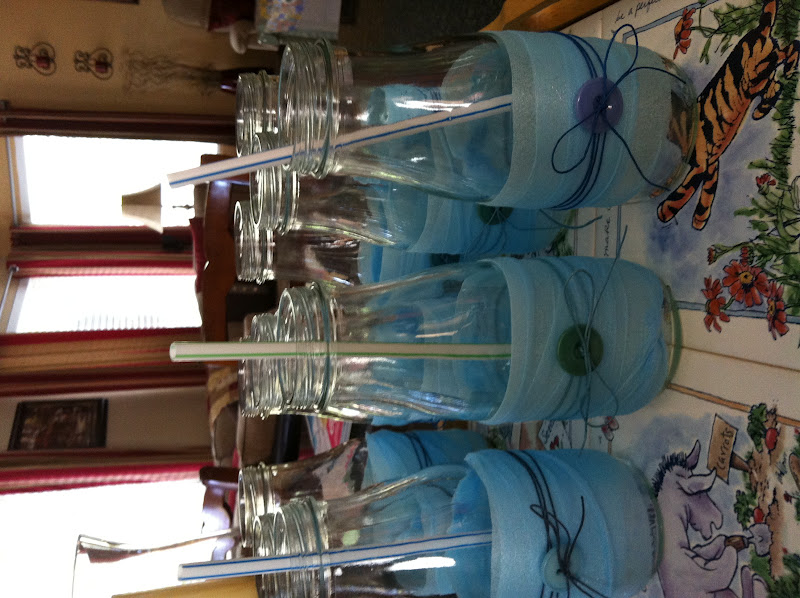
This area is my kitchen island where we set up for the food and drinks.  You can see all the little touches we added to bring our theme into this room.


We chose cupcakes instead of the traditional shower cake; they were absolutely yummy, as were the rest of the decedent desserts.  Thank goodness we chose to make a refreshing rainbow sorbet punch, French Lemonade and ice tea to drink; it was almost 100 degrees that day.


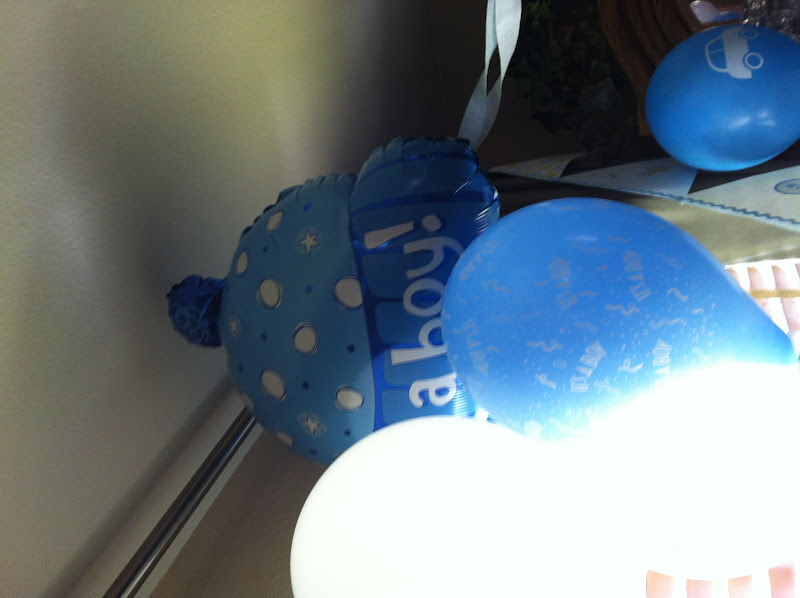
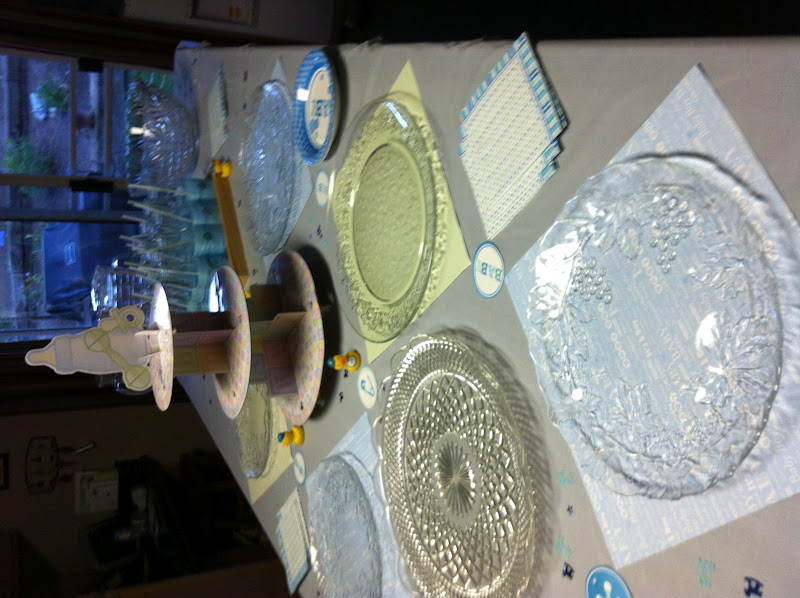
The sign in table was just darling with its white mums, balloons, confetti, and mini yellow rubber ducks.  Our gift table sat in front of the window so it was hard to get a decent photo but you can see the balloons, confetti filled table and the baby bunting hanging above the table, it was a really cute area.

Gosh there were tons more photos to share, I took about 100, I think I will stop here or it will take you all day to look at them. Since I didn’t do a double post Monday, I will share the last minute decorating project I did because I needed to pull the whole room together for a cohesive look.


A few days before the shower, when we began the mock set up for the shower, we realized we needed something around the gift table to tie it into the rest of the rooms.  I came up with the idea to make a paper baby bunting to hang over the table using the same scrapbook papers we were decorating the kitchen island and the sign in table with. I cut out large triangles, stapled them together, added jumbo rick rack across the whole top of the row, glued on vintage buttons to the ends of the triangles, and decorated the flags with embossed stickers and tags.  They came out so darling, they really fit the space and completed the room.


My very last project was to fill the favor bags with the flower pens, notepads and the charm pins.  The gift bags really came out cute with everything all in one place; they were a hit with the ladies.

Thanks for your patience with all the projects and photos of the baby shower, I promise this is the last of the baby boy blues for that event.  I hope you got some great party ideas you can adapt for your next event.  It is now time to move onto other projects and new adventures from my studio, I am not sure what’s up next but I do know I have a number of projects waiting to be shared with each of you.
See you soon.

Laurette

You might also like:

Finishing The Blues
Baby Boy Charm Pins
Blue & White Flower Pens
Note Pad Blues


Thursday, July 19, 2012

Taking A Moment

It is party time on Saturday, I am taking a few moments to catch up, then finish up all the little details before my son and his wife arrive Friday evening for their baby shower the next day.  I have enjoyed sharing all the projects we did for this special event, I plan to share some party photos with you early next week.  So..... for now, I am taking time to stand still........ breath......and think.  I will return very soon, see you then!****

Laurette

Sunday, July 15, 2012

Finishing The Blues


Thanks to my daughter we were able to complete one of our last projects for the shower next weekend, at least the ones she could help me with. Here are some photos of our newest creation.

We gathered together some of our bits and pieces did some brainstorming and went to work transforming some empty Starbucks Frappucino bottles into fun party drinking glasses. I love the shape of these bottles and have been collecting them for years using some of them to store pencils, paintbrushes, buttons and an odd assortment of embellishments, the rest of the bottles have been stored away waiting for a project.  We soaked off the labels in super hot water then ran them through the dishwasher to sterilize them, all ready to decorate.


We wrapped the clean bottles in foam wrap, tied some colored twine around the foam wrap and finished them off by threading the twine through some retro blue buttons from my collection, tying them off with a bow. Super darling with coordinating striped straws, placed on a Winnie The Pooh serving tray, how cute is that, recycling at its best!


We got our inspiration from one of my favorite creative magazines, Stitch/Craft Create; we saw their darling bottle makeovers on a number of pages and decided we could do something like that with my collection of bottles to fit our theme.  You just never know where your next idea is going to come from.

Thanks for letting me share these fun little drinking glasses with you; we had a great time making them.

Most of you will be reading this on Monday so guess what time it is???........
It is double post Monday!!! Instead of sending out two different postings I am going to put them both on one page for easy reading. This next project was a result of some project leftovers from the charm pins.

I really wanted to make myself a baby boy charm bracelet to wear to the baby shower; I am the grandmother after all.  We had plenty of silver charms leftover and one of each of the enamel charms, I had some silver jump rings and a double strand silver chain, just enough to make my bracelet. It has been a while since I did any jewelry making so it took me a bit to get the fingering just right but eventually I figured out how to get everything going in the same direction and I was off and running.

My bracelet came out just beautiful and looks really sharp against the blue background.  I am very happy with it and I can’t wait to wear it to the baby shower.

Thanks for letting me share all of my baby shower projects with you this past couple of weeks; it was a lot of fun seeing what we could make ourselves instead of just buying everything ready made.  I just have a few things to stitch up for the baby, I am hoping I can get to them before Saturday, keep good thoughts for me.
See you soon.

Laurette

You might also like:

Baby Boy Charm Pins
Blue & White Flower Pens
Note Pad Blues
All About Babies
Back To Babies

Friday, July 13, 2012

Baby Boy Charm Pins


This is going to be a quick post even though the project I will be sharing was not quick at all, in fact it was very time consuming. My daughter and I decided we wanted to make a memorable baby shower gift which would not just be thrown away in a few months, we wanted to create something which would last for a long time; we chose to make charm pins featuring silver and enamel baby charms.  Little did we know, when we picked out all the embellishments, it would be so labor intensive attaching all the little charms and ribbons.  It was a lot of fun and went really well once we got a rhythm going between us, good thing there were two of us or I would be working on them until the night before the baby shower.

I gathered some of my jewelry making tools and jump rings along with all the charms and the pins we shopped for and bought on line. We did a test run to see how things would look and got to work once we agreed on assembly style, no two pins are alike.

Some of the pins before we attached the ribbon and the backing cards my daughter designed just for them.

A close up of the test pin we used to help us choose ribbons and what kind of mounting paper or card they would be attached to.

These are some of the charm pins completed and displayed on their cut little baby boy cards.  They really came out darling, our jewelry making skills and my daughter’s graphic arts talent really helped us create a one of a kind gift for each of our guests.

Thanks for letting me share our Baby Boy Charm Pins with you even though it was just a quick post.  I think I have just one more baby shower project to share with you, but who knows, I may do one or two more things before the party.  Next week I will be sharing the rest of the gifts I am making for the baby, keep checking daily so you can keep up and not fall behind.
See you soon.

Laurette

You might also like:

Blue & White Flower Pens
Notepad Blues
All About Babies
Back To Babies

Thursday, July 12, 2012

Blue & White Flower Pens


Project number two was to make some really cute flower pens for each of our guests to use during our party games.  I guess I could have just bought some blue pens and left it at that but then I would not be me if I did not add a bit of floral bling to those basic blue pens.

Off to Target and Michael's to get some pens, paper flowers and some foam wrapping tape, all in our blue and white baby boy theme.


This was not a very difficult project, just a time consuming one, with wrapping each pen and flower with the foam wrapping tape and getting it to stick the way I wanted it to, some double sided tape did the trick.  They are really darling and look so cute with the little notepads I made earlier, what a nice set to send home with the ladies along with a few other surprises.

Thanks for letting me share my Blue & White Flower Pens with you, I will be working on the party favors next, just a small hint, think jewelry.  It is time to go, lots more to do after I clean up my huge mess and start a whole new one. (Sigh)
See you soon.

Laurette

You might also like:

Notepad Blues
Fun Fabric Animals
All About Babies
Back To Babies
Pretty in Pink


Tuesday, July 10, 2012

Notepad Blues


First project up is the notepads for the games at the baby shower.  I dug through my all my scrapbook paper stacks/slabs, ribbons, buttons, brads,  stickers and crafting supplies looking for baby boy themed embellishments and prints.  I was very surprised how many little things I accumulated over the years in blues, greens and yellows.  I still had to do some shopping because I did not have everything I needed for all my projects, but it was a good start.  I grabbed some empty photo boxes and gathered it all together in one place for easy use and transported it downstairs to my huge granite island where I like to work on my projects when my cutting/project island, in my studio, is busy with fabric projects, which it is at the moment.

Work began on the notepads we will give out to each guest so they can participate in some quick and easy games. I am not always neat when I am in the creative process but I do clean up once I know what direction my creativity is going.

Everything is cut and ready to assemble using some rectangle sheets of scrapbook paper, printed tags, ribbon, a small round punch and several shades of blue colored copy paper.

Here are some of the notepads all finished and ready for our guests, aren’t they adorable!

Thanks for letting me share my Notepad Blues with you, right behind it are some darling flower pens, look for those in my next post.
See you soon.

Laurette

You might also like:

All About Babies
Back To Babies
Fun Fabric Animals
Pretty In Pink


Monday, July 9, 2012

Where I Sew


Recently on the Pink Chalk Studio Blog, by Kathy Mack, she began a month long virtual studio tour sharing a peek at the sewing studios of some of her favorite designers and sewing enthusiasts, real spaces where real people sew. We, her readers, were also invited to share our studios on her blog mosaic, what a fantastic idea.  I jumped on board with the help of my graphic designer, from A Jeweled Design, who figured out how to link the photo directly to the blog page, the photo originated from, to the Pink Chalk Studio blog. She then added the Pink Chalk “Where I Sew” icon to my blog post pages, in the side bar right below the sites I follow, so you can click on the icon and go directly to Kathy’s virtual tour page and see my studio photo, click on that and you get my blog page for that post. I highly recommend you also click on all the studio photos and enjoy some really wonderful creative spaces.  Since the photo from my studio only featured one area, I decided to do a virtual tour of my own showing you where I create, a couple of the photos are a bit dark because of the three windows, which pour in sunlight and make it tough to photograph, while other areas are a bit tricky to get a decent shot, hang in there with me, you will get the overall idea.  Here we go.

This is the photo submitted to the Pink Chalk Studio Blog which happens to be the one of my fabric storage walls, let’s start the tour here.

We move along to the adjoining corner of the room featuring my cutting table.

Down the window walls is where I keep my paper crafting and jewelry making supplies, it also houses my stereo, iPod, DVD player and flat screen TV.

This is my sewing counter wall which sits directly across from the fabric cubbie wall.  It has 8’ of counter space allowing for two sewing machines or one machine and a crafting area, which is usually the case, unless I am giving sewing lessons and need to put out another sewing machine, I have four of them. There are two small design boards over each area along with some of my dress form collection and couture dress photos.  Above the work stations there is another set of cubes which hold fabrics, notions and more of my couture dress forms.

My fitting corner has 3 mirrors at several heights allowing me to see a garment from several angles, a real must when fitting a garment alone.


Last but not least are the huge white closet doors opposite the windows, these are my inspiration walls with couture photos, a mirror and lots of creative mood boards. I left one of the three doors white to use as a design wall and to photograph projects on. (Not shown here)

Thanks for letting me share the virtual tour of Where I Sew with you, I hope you enjoyed it and it inspires your to find a creative space of your own, no matter what size space you have to work with.  If you already have a place you enjoy sewing or crafting in I would love to see it and share it with my readers, just e-mail me a photo and what kind of things you create in there and I will post it on my blog. It does not have to be a large room like mine, it can be your dinning room table or a closet, I can’t wait to see it, send it on over.
See you soon

Laurette

You might also like:

Fabric Organization
The Organization Bug
Contain That Clutter - Parts 1, 2 & 3
Studio Supply Storage
Studio Inspiration Boards


Happy 4th Of July


I hope each and every one of you had a wonderful and spectacular 4Th of July!!

(Photo compliments of Jolene Burt of A Jewel'd Design)

I know I am a bit behind, things are really ramping up with so many projects and house prep for the baby shower in less then two weeks.  I have been out shopping for pieces for my projects, which I started a few days ago, not to mention the deep cleaning and all the sewing of the baby gifts for my new grand baby.  You are going to be seeing quite a few of the fun projects as I finish them, check daily.  For those of you attending the baby shower just act surprised and fuss over them like you have never seen them before. (Giggles!)  Anyway… I am off and running but wanted to share a cute patriotic centerpiece for the dinner table, you can put it into your creative file for next year’s decorations.

This centerpiece starts out using a plastic hat with a wide brim wrapped in a red band with some patriotic stickers placed in the middle of the band.  I glued in a Styrofoam block and then covered it with red crinkle paper shred. Next I punched in some flag pinwheels and two mini American Flags. It really brightened up the table when I added a red table cloth and some red, white and blue fabric as a runner, all set and ready to party.

Thanks for letting me share my patriotic centerpiece with you; this is double post Monday so look for a second post right behind this one with more to follow all week long.
See you soon.

Laurette


Monday, July 2, 2012

Rock'n Garden


I had no idea I was going to be away from my blog for so long, this spring and summer have been full of events, projects and entertaining almost non-stop, keeping me pretty tied up and unable to write about all the fun we are having. I can’t remember when we have been so busy at this time of the year. Because I was gone so long I thought I should start sharing some of the projects we have been working on. 

This weekend’s project was in the backyard re-working some of the existing landscaping.  The yard was once a real showcase with lots of expensive designer landscaping all around the whole yard, because it was empty for over a year just about every area suffered neglect. Space by space we have been re-working and re-using as many of the existing plants and landscaping materials as possible.  There were a ton of river rocks all over, which had once been artfully placed to show off each specific area, little by little we dug up the rocks and repositioned them so they could be seen instead of being buried in mud and debris.  After two years of backbreaking labor we just had one area left to complete.  It was the area hit hardest with flooding whenever it rained and the gutter ran too fast, the water backed up into the lawn and the garage.  The soil in the rock beds had built up with sediment and leaves over time, creating a back up not allowing the water to drain, which meant it was a big project, it went to the bottom of the list until we had the time to fix it properly.  It was time to complete the landscape and eliminate the flooding; we are having the baby shower in two weeks and we want to have the party outside on the patio, weather permitting.

Stage 1: Work in progress


After:

For some strange reason the rocks had been originally placed up by the plants with a huge open area of dirt between the bender board and the green plants. We thought maybe there had once been rocks there but had no way of knowing so we did some digging and found quite a bit of rock under the mud.  We dug them out and washed each of them off then re-positioned them next to the bender board forming a nice little river rock boundary for the water to run over during the rains.  Once we had the rock in place we finished up by adding Scott’s Nature Scape in Sierra Red, very pretty creating a nice contrast with the red up against the rocks and all the greenery.


This was the area which created the build up of soil, leaves and eventually excess water when it rained.  We had to do a lot of digging to find the rocks under the sediment which we removed by digging out the extra soil and rocks then putting each stone back one by one.


Everything is back in place, all the rocks were cleaned up as well as the planting beds which got more of the Sierra Red bark to add contrast and cut down on weeds.  This project took seven hours of tedious, backbreaking work over a two day stretch to complete.  My husband and I were thrilled to be done and very happy with the final results, I don’t think we will be doing anymore bending over or digging in the next few weeks or until our backs recover. Our landscaping projects are complete, at least for this year; next up is my patio makeover which I hope to get finished by the baby shower, fingers crossed.

Thanks for letting me share our Rock’n Garden with you; I hope you enjoyed the last of the landscaping projects for this year, next spring we hope to be refinishing the patio pergola and moving onto some larger backyard projects.  I am not sure what else I will be sharing with you since the baby shower is coming up in a couple of weeks, I hope to have time to show you some of the projects we are working on for that, including some yummy snacks for the ladies.
See you soon,

Laurette

You might also like:

Time For Lime
The Red Door
Mailbox Makeover
Rose Rescue
Spring Shed


Related Posts Plugin for WordPress, Blogger...